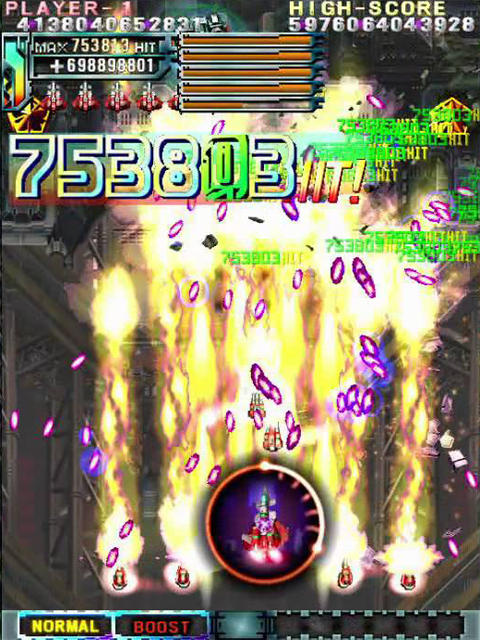

“Somebody, Stop Me.”
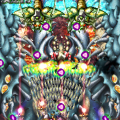
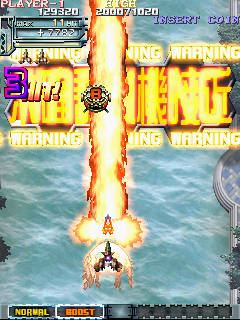
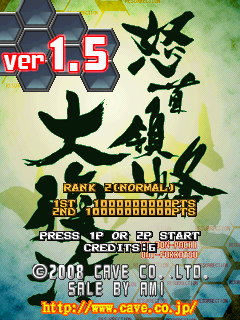
Dodonpachi Daifukkatsu (lit. “Angry Leader Bee Great Resurrection”) was developed in an incredibly short time span of around five months. The game was released on the Cave CV1000-D, or the SH3-b PCB. The new SH3-b boards were similar to the SH3 boards powering all Cave shoot-em-ups released after Mushihimesama, but featured more RAM than the original SH3 hardware. After Cave had shipped the game, but before it was distributed to the public, some of the staff were playing the game casually when they noticed something…there was a scoring bug on the Player 2 side. If the player scored high enough, the first digit would disappear off the screen. This prompted Cave to intercept the finished PCB’s before they were delivered, remove the PCBs, reburn the ROMs, repackage and seal the PCBs and then drop them back off at the distribution center. It was a very serious matter for Cave, so imagine how they reacted when they found out that the updated “Version 1.0” of the game still had a counter-stop, and a safe spot during one of the TLB’s attacks. This prompted Cave to release an updated version a month later known as Ver. 1.5 a few months later. The update added two additional digits to the player’s score, remove the TLB safe spot in addition to making the fight harder as punishment. Ver. 1.5 also saw the return of the Type-B helicopter from previous Dodonpachi games. The gameplay and scoring sections of this article will use the updated 1.5 version of Daifukkatsu, but a majority of the information presented will be applicable to both versions of the game.
Story
Shortly after the conclusion of the “Blissful Death Wars”, a one Colonel Godwin Longhena was appointed commander of the entire Dodonpachi Corps. Six years after later the Dodonpachi Corps detected a time-space anomaly from their moon base: a slight time-space rift, one normally occurring when using a Jump Gate to travel through time-space. The Colonel was not one to let even a minor time-space disturbance pass without investigation. After a lengthy investigation, it became clear that someone was sending great masses of material into the past.
The transported material had started as a minor program: a virus surviving within a massive sea of data. With time it expanded itself, evolving. When the Dodonpachi Squadron analyzed the program, they found a personal code, which was traced back to the Element Doll EXY… The Colonel could ill conceal his found mood, “Surely the past could not be rewritten…” To protect humankind, nay to protect his invincible army, he would not permit such impudence from an “android” that was nothing more than waste matter, something born from a process that had aimed for perfection.
Secretly…the Colonel thought to himself: “Rewriting the past…is such a thing possible…?”
The Dodonpachi Squadron scrambled. One after another they shot through the jump gates, and into the past to chase EXY. However, the enemy had anticipated their pursuit. Once inside the jump gate, the battle was upon them. A battle beyond their expectations commenced, leaving only one mother ship and several carrier-borne fighters to reach the past. The time at the other side of the game was May 2008, Japan. Quenching the flames of war demands that its ashes be ignited once more. The cacophonous buzz of bee wings is unrelenting.
Characters

A.I.
A girl who wears the face of a prototype Element Doll, she was created by Next EXY. A.I. transforms into a colossal winged machine in order to hold off the pursuing army arriving from the future. Although she must stay faithful to eradicate the humans pursuing Next EXY, doubts form in A.I.’s mind. Her orders contradict the guiding principle of the Element Dolls, which was to assist mankind.

Next EXY
Also known as NEXY, she is the perpetrator behind the current conflict. NEXY has travelled 1,000 years in the past in a desperate attempt to prevent a calamitous war from breaking out in the future. Her target is the weapon production facility that will one day assemble the mechanical armies of a deranged leader. Although she has emulated the form of the Element Doll EXY, she calls her squad of deadly fighters “Element Daughters” to distinguish them from their predecessors. Next EXY can transform into an aquatic fighter craft when in combat. She is merciless in the execution of her mission, but kind to her allies. However, one finds themselves asking…is she really behind it all?

Element Daughter 03 “PERFECT ☆”
A sunny girl who is full of energy, PERFECT ☆’s Element Doll was completed after the Blissful Death Wars, and never saw combat. Originally assembled with excessive precision and an intricate balance, her original form could not be rebuilt to those standards, and as a result, PERFECT ☆ developed her own behavior and speech patterns.

Element Daughter 04 “Ray’n”
Ray’n wears the face of Leinyan, an Element Doll who was capable of feeling emotions. Once entrusted with the task of defending humankind, but Ray’n now fights against the Dodonpachi Squadron to ensure NEXY’s plans are successful. Ray’n retains her ability at using optical weapons, and possesses highly destructive attack power. She combines with a rocket attachment to completely overwhelm her opponents in battle.

Element Daughter 05 “Shooty”
Shooty wears the face of the Element Doll “Shotia”, the most simple and pure of the Element Dolls. Reborn as an Element Daughter, her innocent mind remains focused on serving her master. Her master known as NEXY. Shooty’s mission was to eliminate the pursuing humans from the future, and then use their Jump Gate to return. Her attitude toward her former masters, the very same Dodonpachi Squadron she must destroy, is civil, yet uncompromising.

Godwin Longhena
Officially, he is the supreme commander of the Dodonpachi Corps, and his orders are absolute. Godwin silently advances the “Project to Defend Earth” together with his genetic brethren, those who has inherited the grand goals of his ancestor, Colonel Schwarlitz Longhena, who existed over 1,000 years ago. He manipulated the original Elemental Doll Exy into irrevocably altering the past, in an effort to change the future.
Gameplay
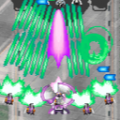
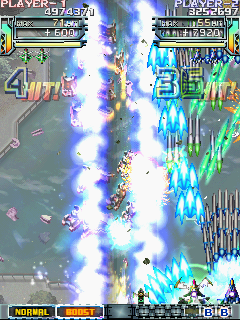
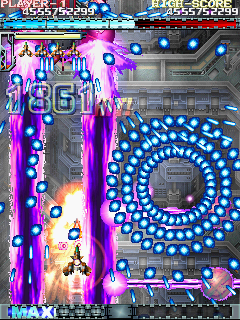
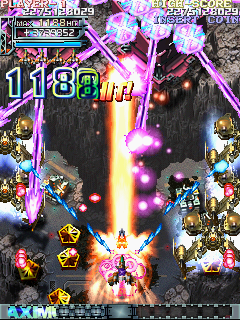
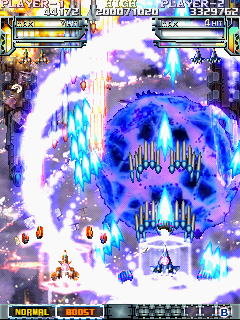
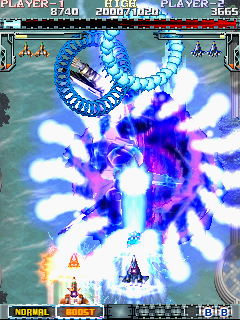
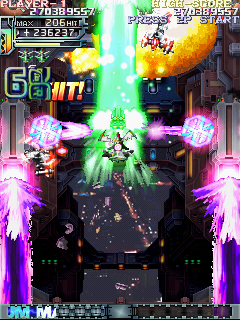
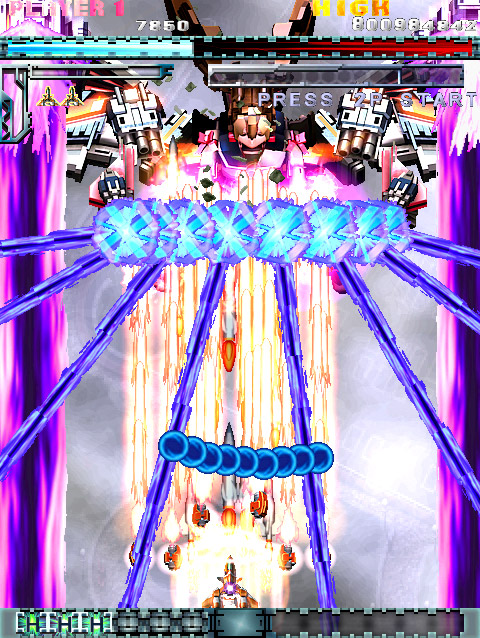
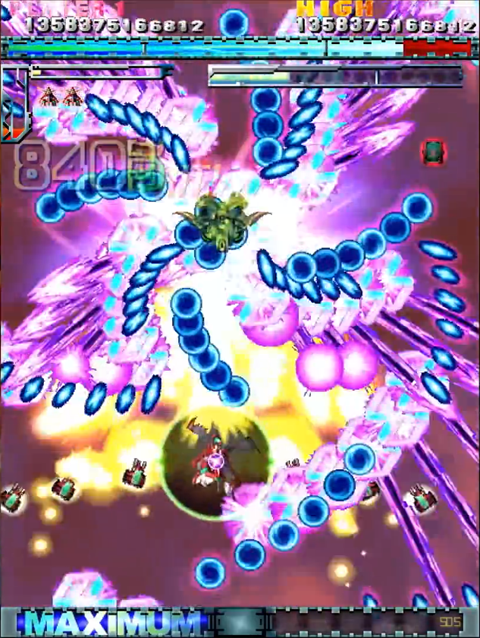
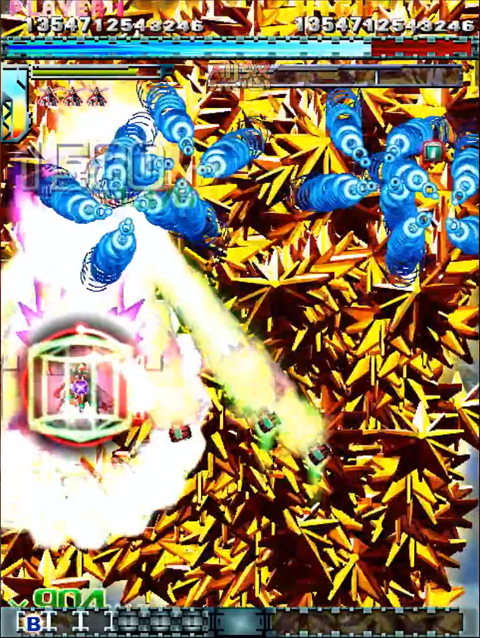
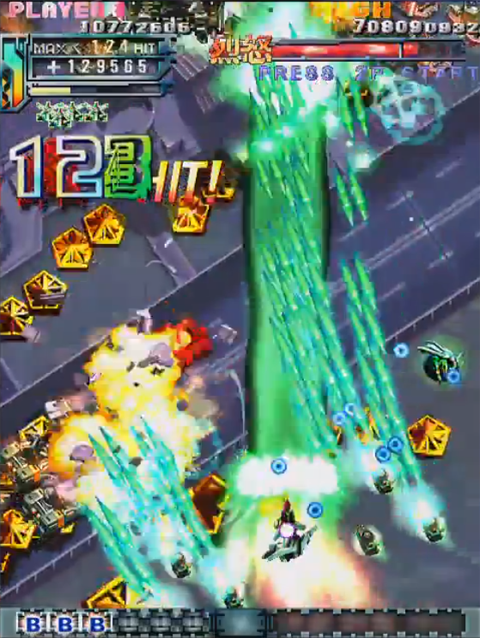
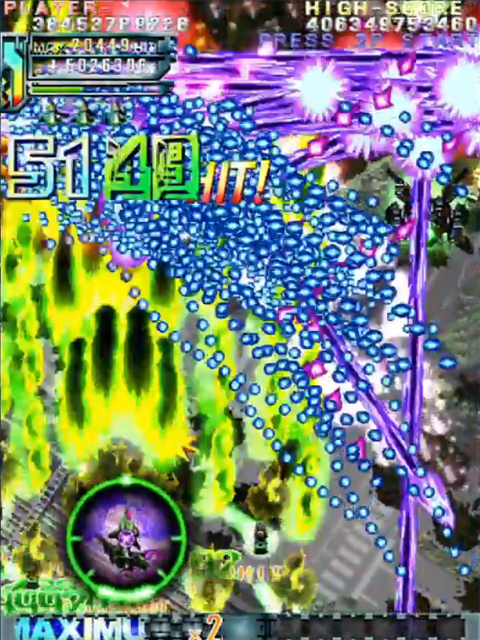
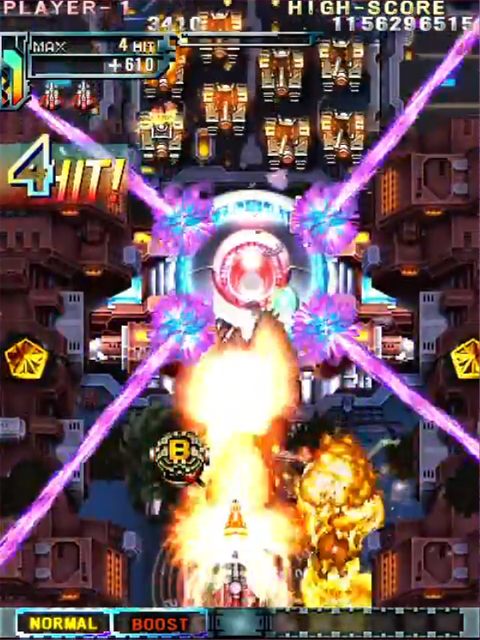
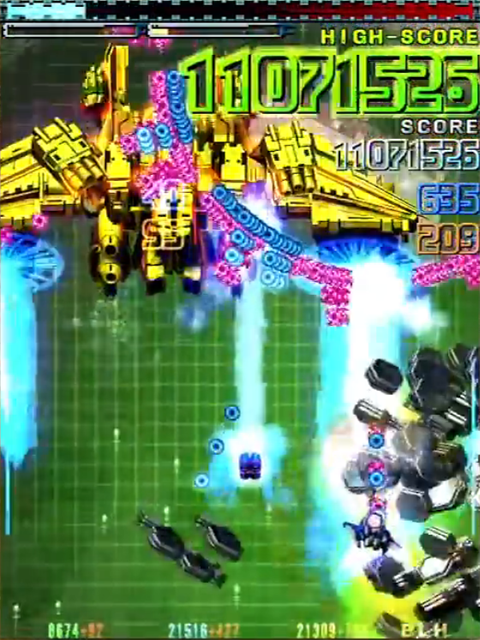
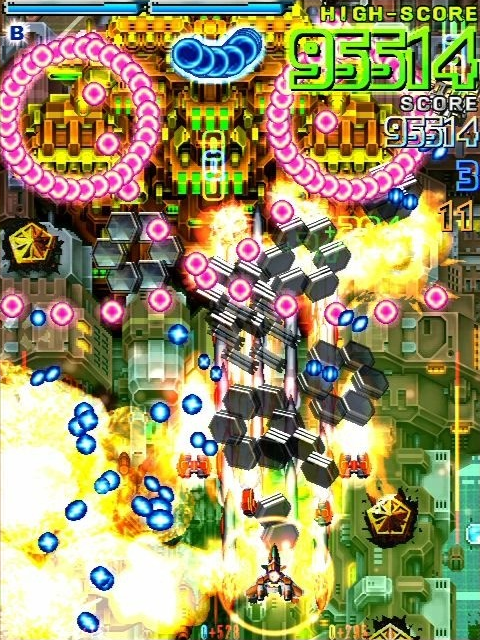
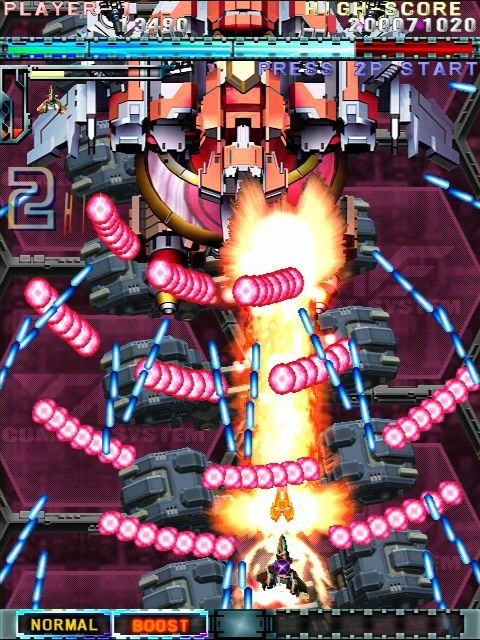
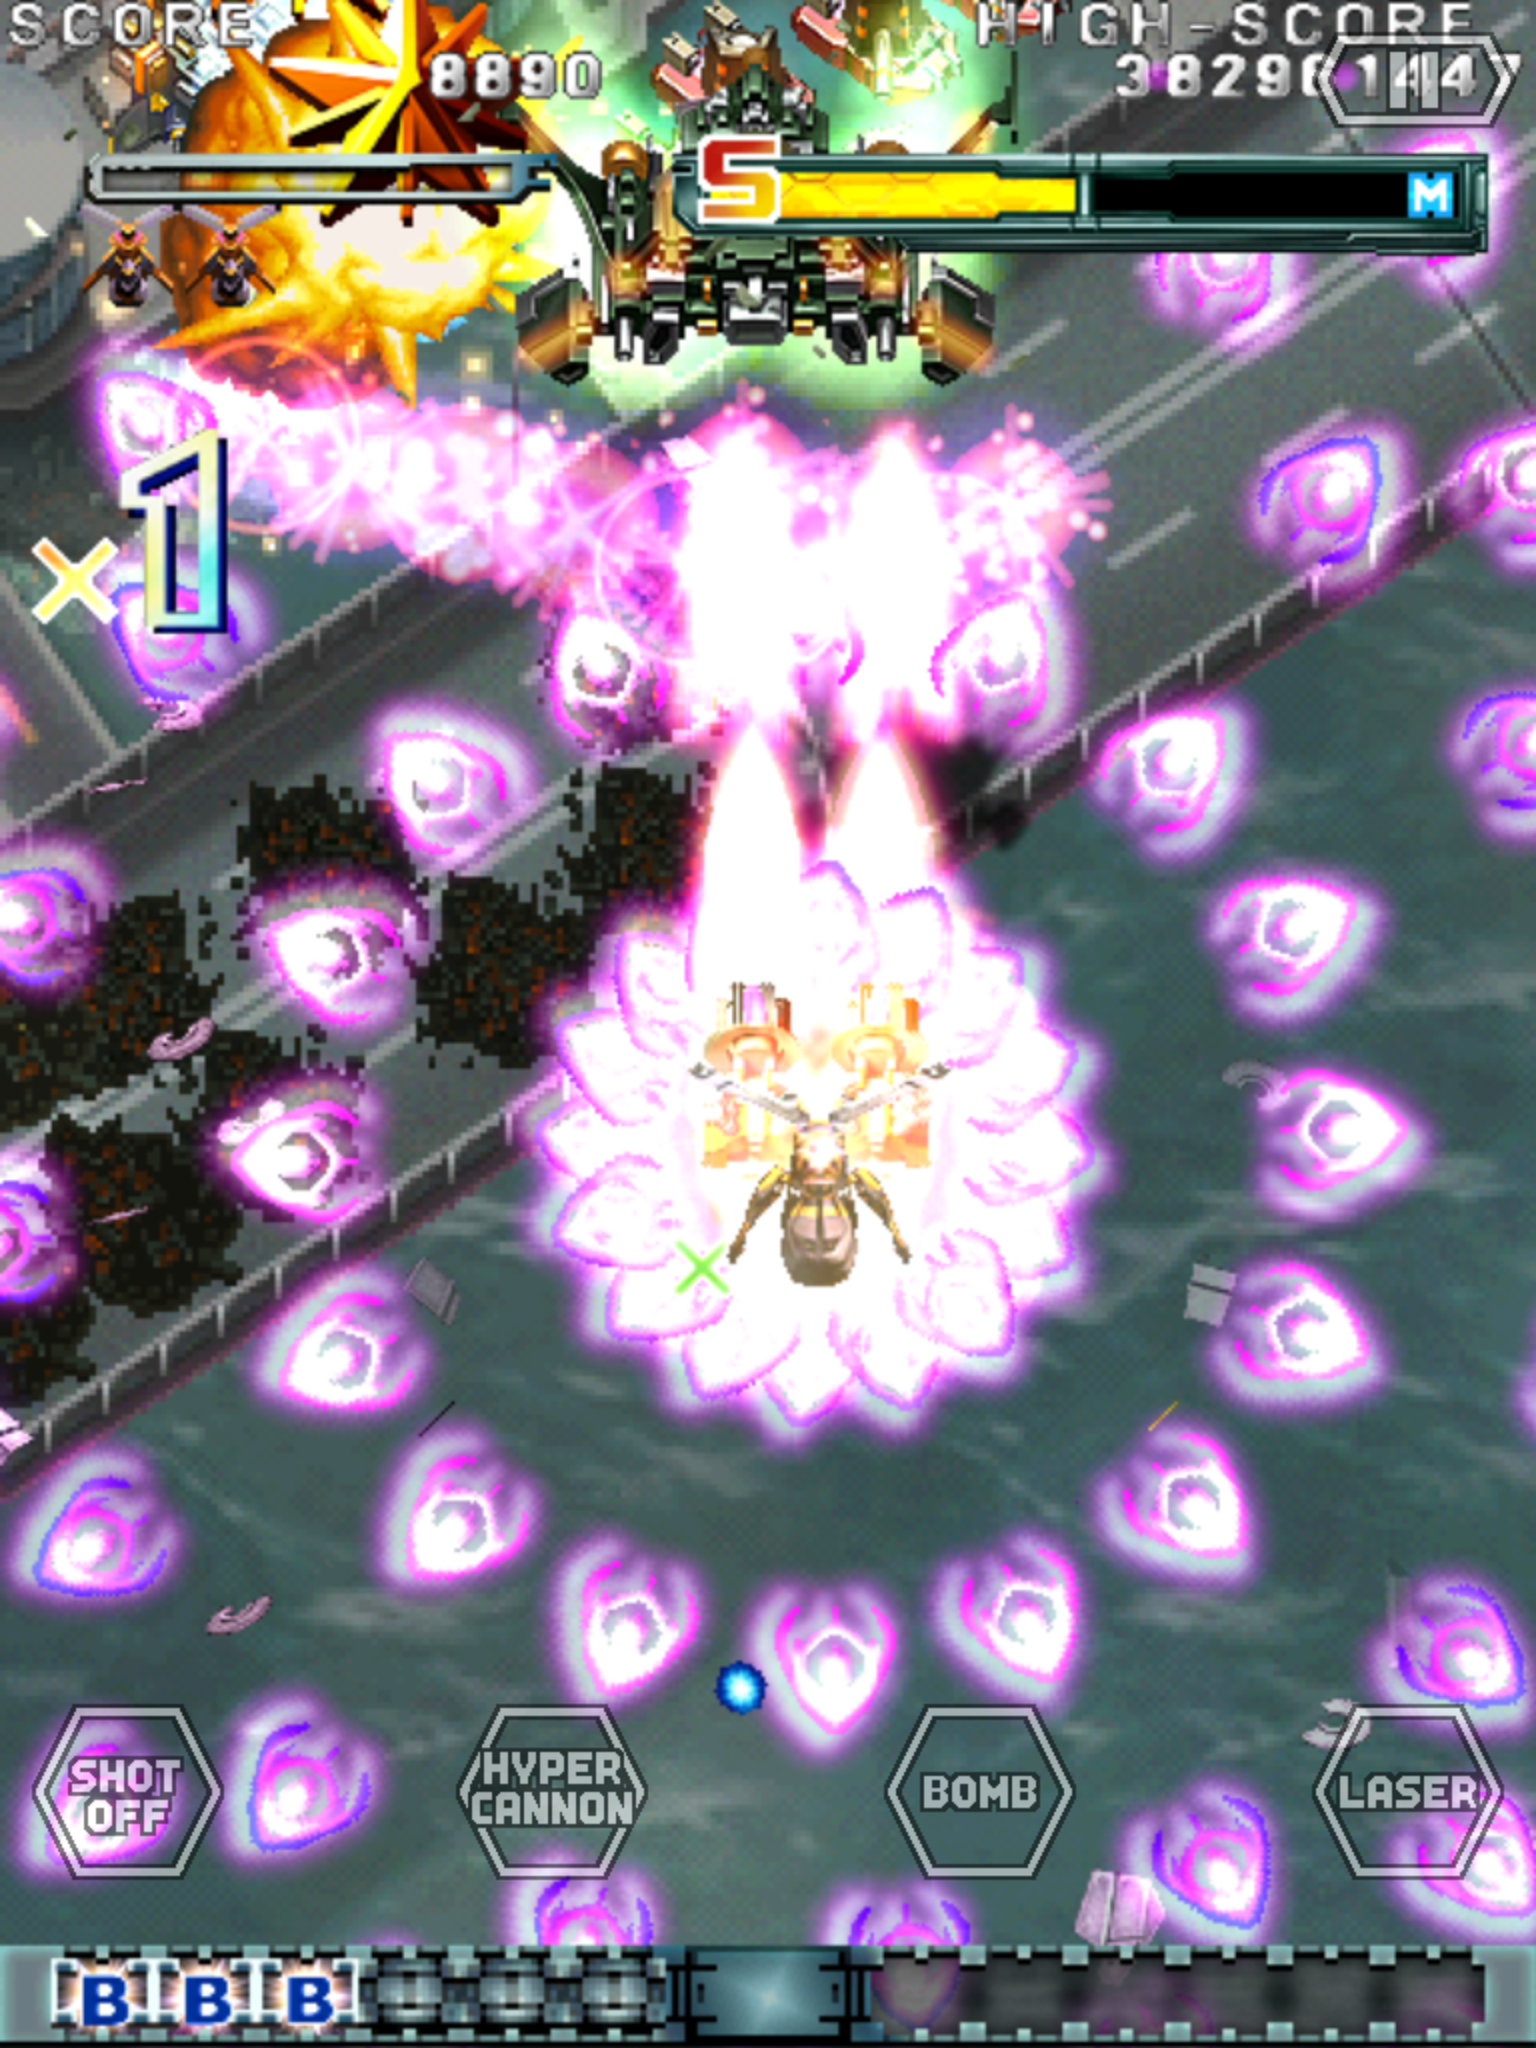
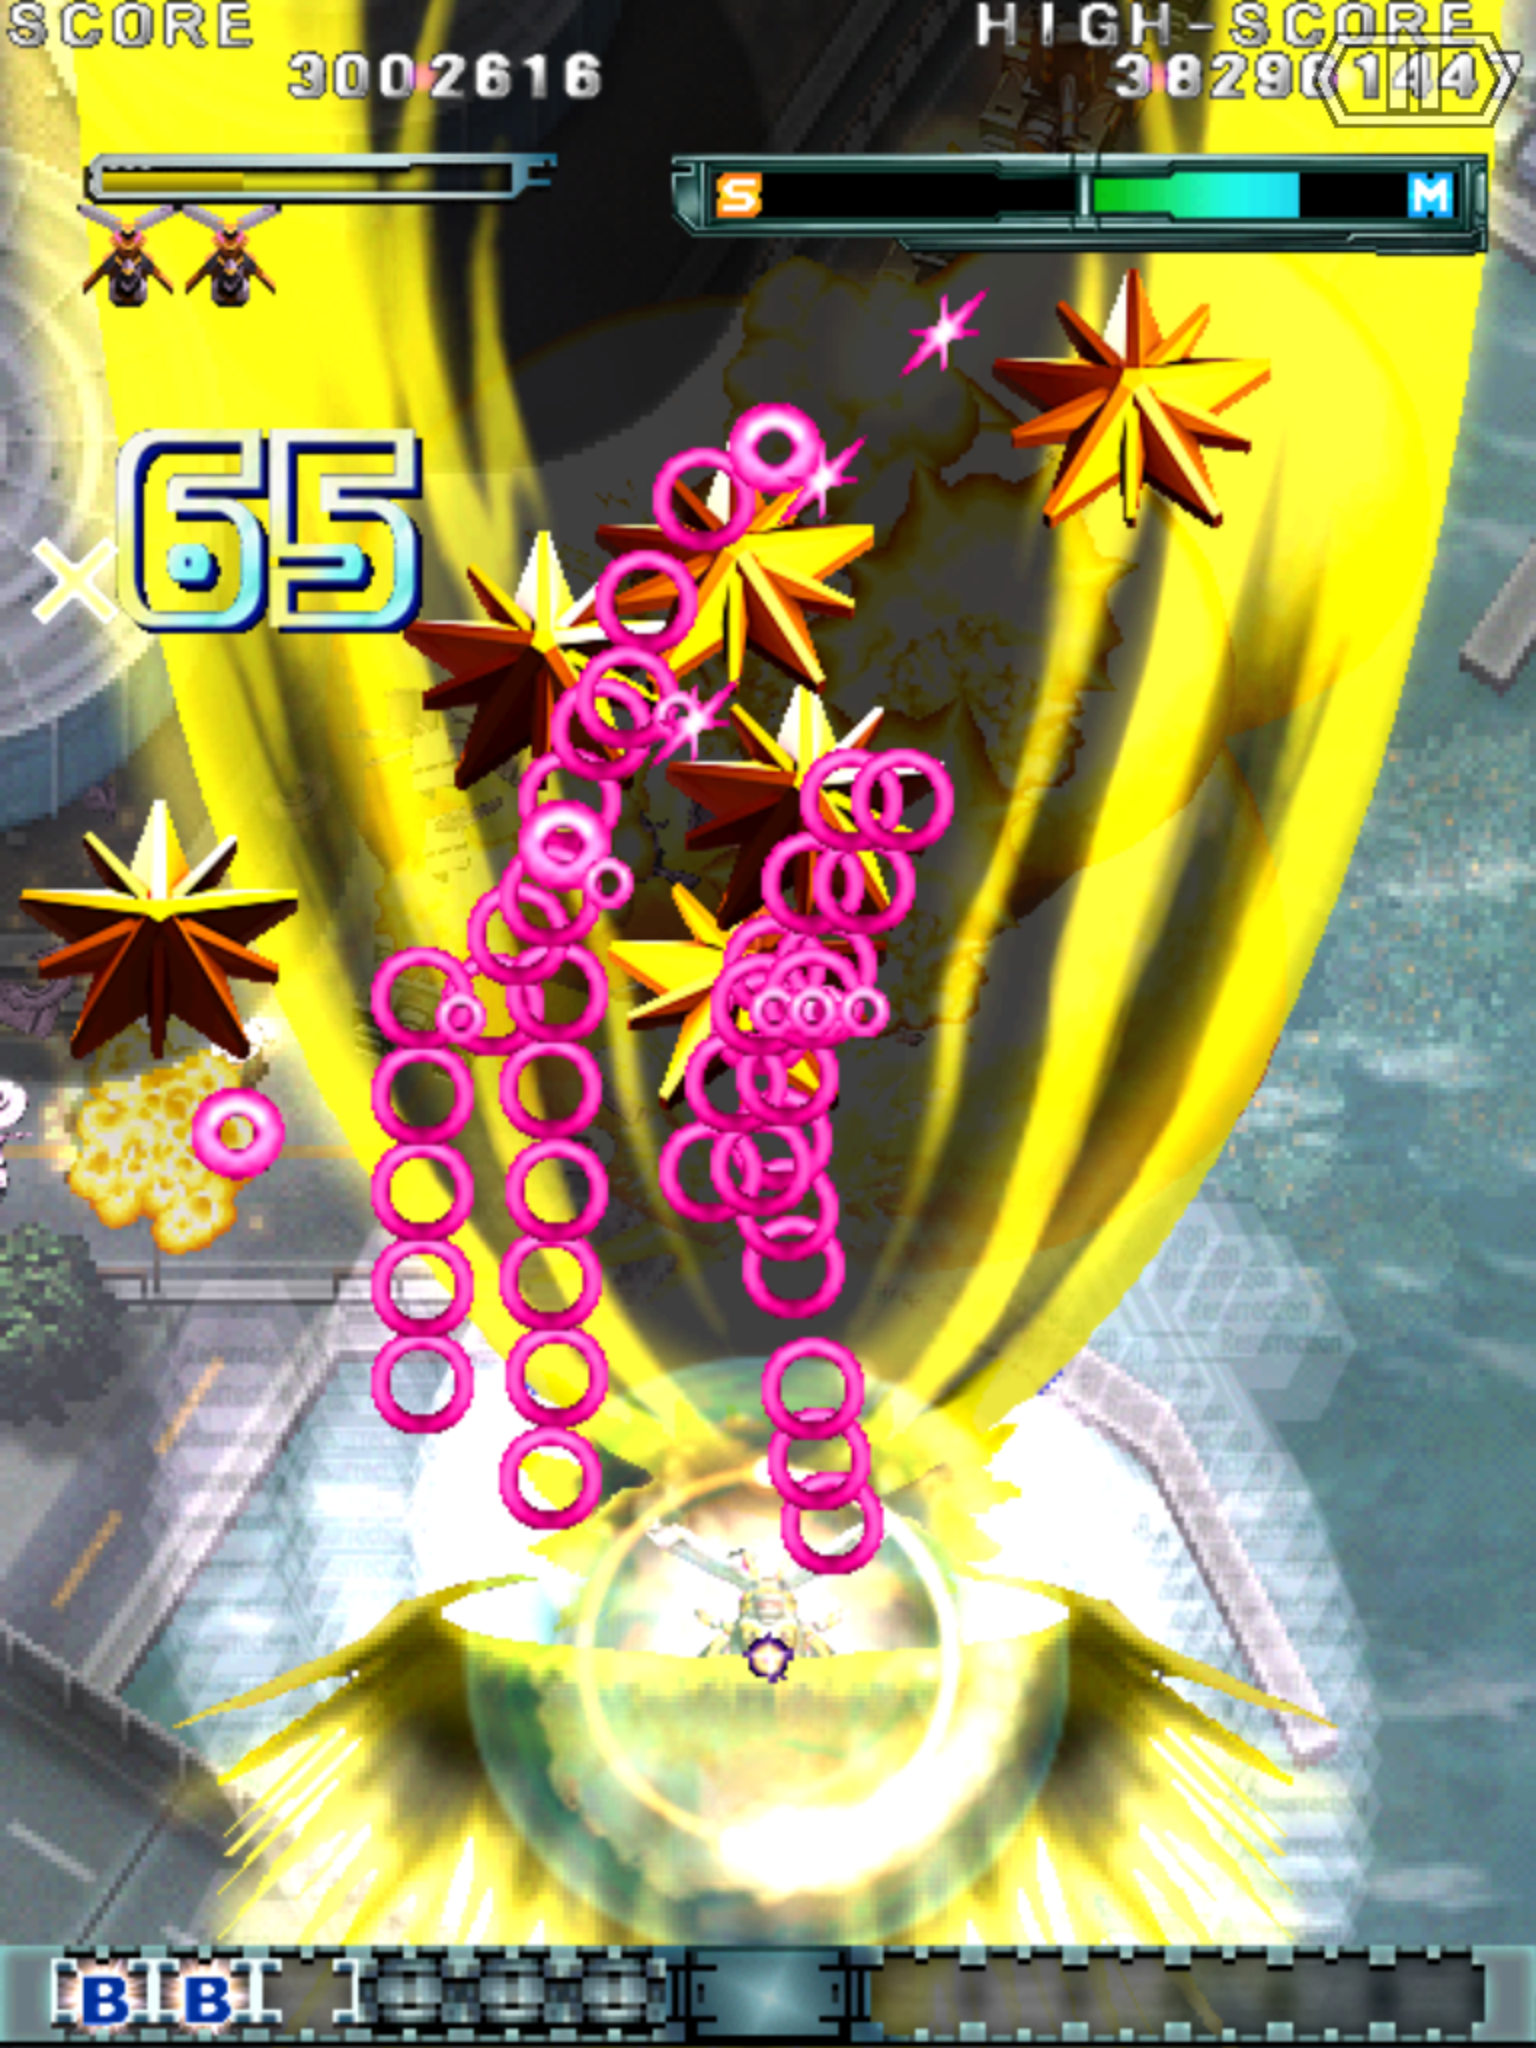
Dodonpachi Daifukkatsu, uses an eight way joystick for their ship’s movement, and four different action buttons. Pressing and releasing the A button causes their ship to fire a Shot, and holding the A button releases a Laser attack. The B button releases a bomb, or changes modes, depending on what “Style” the player is using. The C and D buttons are interchangeable thanks to two different button configurations. The Type-A configuration sets the C button to the auto fire function, and sets the D button to the Hyper Counter activation. The Type-B button configuration flips the C and D button’s functions. Daifukkatsu still retains the chain-based scoring system, and the game’s interface is functionally identical to what it was in Daioujou, with the exception of the Hyper bar being placed below the GPS, rather than the side. Daifukkatsu‘s Hyper Counter system, functions much like Hyper Counter in Dodonpachi Daioujou Black Label EXTRA ‘s X-Mode, allowing the player’s Hyper mode to cancel other bullets for score. New to Daifukkatsu is the Counter-Laser system. Players can “counter” or “hold” enemy lasers by hitting the laser with their own. There are two types of lasers in Daifukkatsu. The first type of laser is a weak thin pink laser which can be countered by any style’s laser beam, while the second type, a strong wide purple laser, can only be countered by the Power Style’s Boost Mode Laser, or the Strong Style’s Laser. The Hyper Counter’s Laser will push back both types of Lasers, regardless of Style.
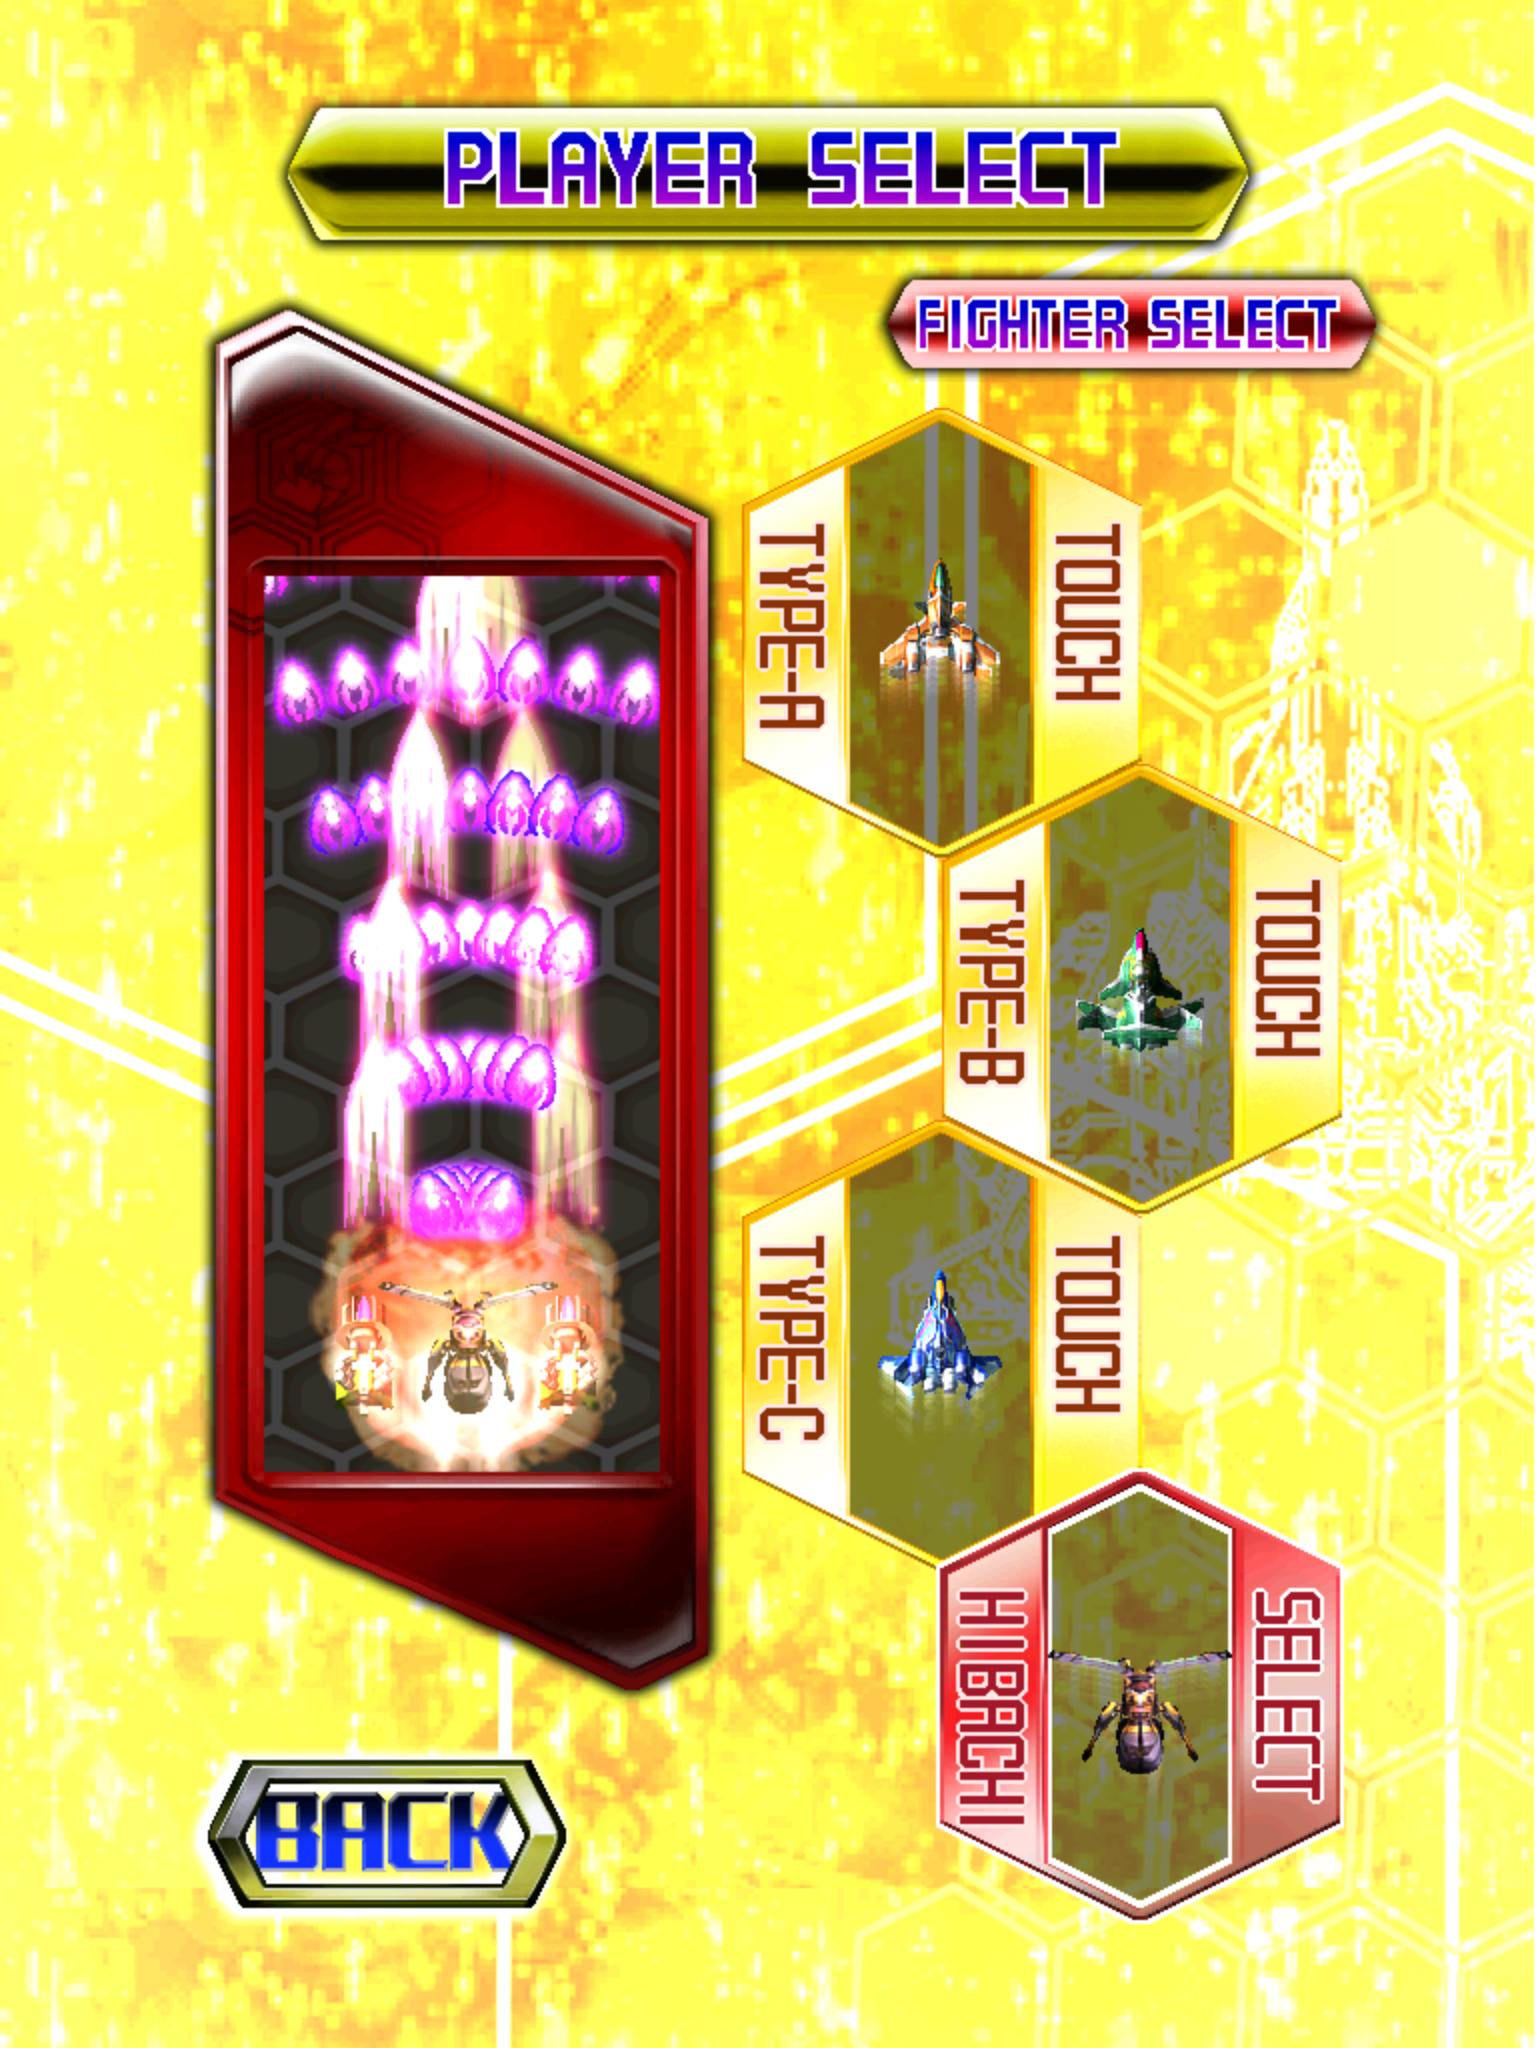
Dodonpachi Daifukkatsu Ver. 1.5 marks the return of the three “standard” DonPachi ship types, with new names for each: the red Type-A Do-NX-SF-25B Struggle Fighter “DELTASWORD”, the green Type-B Do-NX-AH-16B Assault Helicopter “BIAXE” , and the blue Type-C Do-NX-FB-72D Fighting Bomber “SPEARHEAD”. The Type-A ship has undergone a bit of a change from its previous incarnations. While the ship still retains its narrow shot width and fast speed, the Type-A ship now boasts the strongest Shot of the three ships, and a stronger Laser as well. The Type-A also receives the highest combo chain bonus when canceling bullets of the three ship types. Due to its narrow shot width and option placement, very intricate route planning is required for good scores with this ship. The Type-B helicopter is still the most balanced fighter, with its movement speed and shot strength lying in between the Type-A and Type-C. The firing angle of the Type-B’s options now varies with the direction the ship is moving in, which can take some getting used to. The Type-B helicopter now has the strongest Laser of the three ships. The Type-B helicopter is very easy to learn chains with, and its option placement can make canceling bullets in Power Mode much easier, however, the variable option angles can easily mess up chain timing. The Type-C ship returns as the slowest of the three ships, and receives the smallest combo bonus while canceling bullets. However, its wide and constant shot allows it to enemies and chain in certain ways that the other two ships just can’t do. The Type-C’s slow movement gives this ship very precise control when narrowly dodging bullets, however, the slow movement speed also means that players may find themselves dropping combos because they simply could not move fast enough.
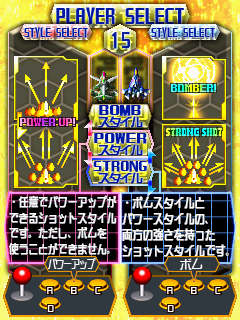
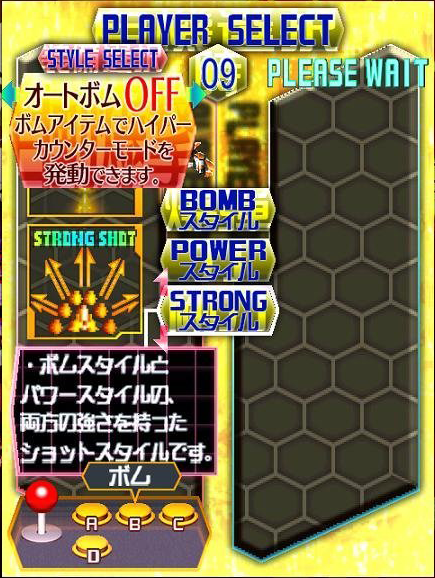
The Element Doll system from Daioujou has been replaced with a “Style” system in Daifukkatsu. There are a total of three Styles in Daifukkatsu: Bomb Style, Power Style, and Strong Style, although Strong Style must be unlocked in the arcade versions. Bomb Style gives the player access to bombs, at the expense of having a weaker shot and laser than Power Style. While in Bomb Style, players have the option of enabling Auto Bombing. If a player gets shot, and Auto Bombing is turned on, instead of losing a life, the player will release a bomb instead (provided they have one). The bombs released via Auto Bomb have a much shorter duration than the normal bombs released by pressing the B button do. In Bomb mode, players will have to make use of their Laser Aura to fill the Hyper Gauge at a fast pace, otherwise the Hyper Gauge tends to increase very slowly. If a player is using Auto Bomb, they start the game with the ability to get hit fifteen times before receiving a Game Over, with each extra life allowing them to get hit six more times, and each “B” item potentially allowing yet another hit. The number of pseudo-lives alone makes Bomb Style a much more beginner friendly style than the Power Style. Power Style is the most interesting addition to Daifukkatsu. Power Style cannot use bombs, with the exception of an Auto Bomb that can be acquired by collecting a “B” item. Instead of Bombs, the B button will switch between “Normal” and “Boost” Modes. Normal Mode sacrifices power for speed, giving the player a weaker Shot and Laser, but increased mobility while in this mode. Boost mode is the opposite, granting the player a powerful Shot and Laser, at the cost of reduced speed. Although players will still receive decreased movement while using the Normal Mode Laser, it is slightly faster than the movement speed while using the Boost Mode’s Shot. Players can switch between modes at any time by pressing the B button, but they will be left vulnerable for a brief period of time while switching modes. While Hyper Counter is activated, canceling bullets while in Boost Mode will fill up the player’s Hyper Gauge. For this reason alone, Power Style players are able to fill up their Hyper Gauge faster than any of the other styles. However, due to the Hyper Counter’s Ranking system, Power Style users need to be careful with their Hyper usage, as overuse can lead to dropped chains or even death. The third style, “Strong Style”, is hidden by default in the arcade version. Strong Style can be unlocked by either entering a special code each time the arcade machine is turned on, or, permanently unlocked on that machine if a player manages to 1CC the game successfully using the Bomb or Power Styles. In the console ports of the game, Strong Style is unlocked by default. Strong Style is a combination of the Bomb and Power Styles, allowing the player to use bombs as well as having their Shot and Laser permanently set to be even stronger than Power Style’s Boost Mode versions. Strong Style does not receive any Hyper Gauge from canceling bullets like Power Mode can, but it does receive the extra “lives” that the Bomb Style receives, so long as Auto Bomb is turned on.
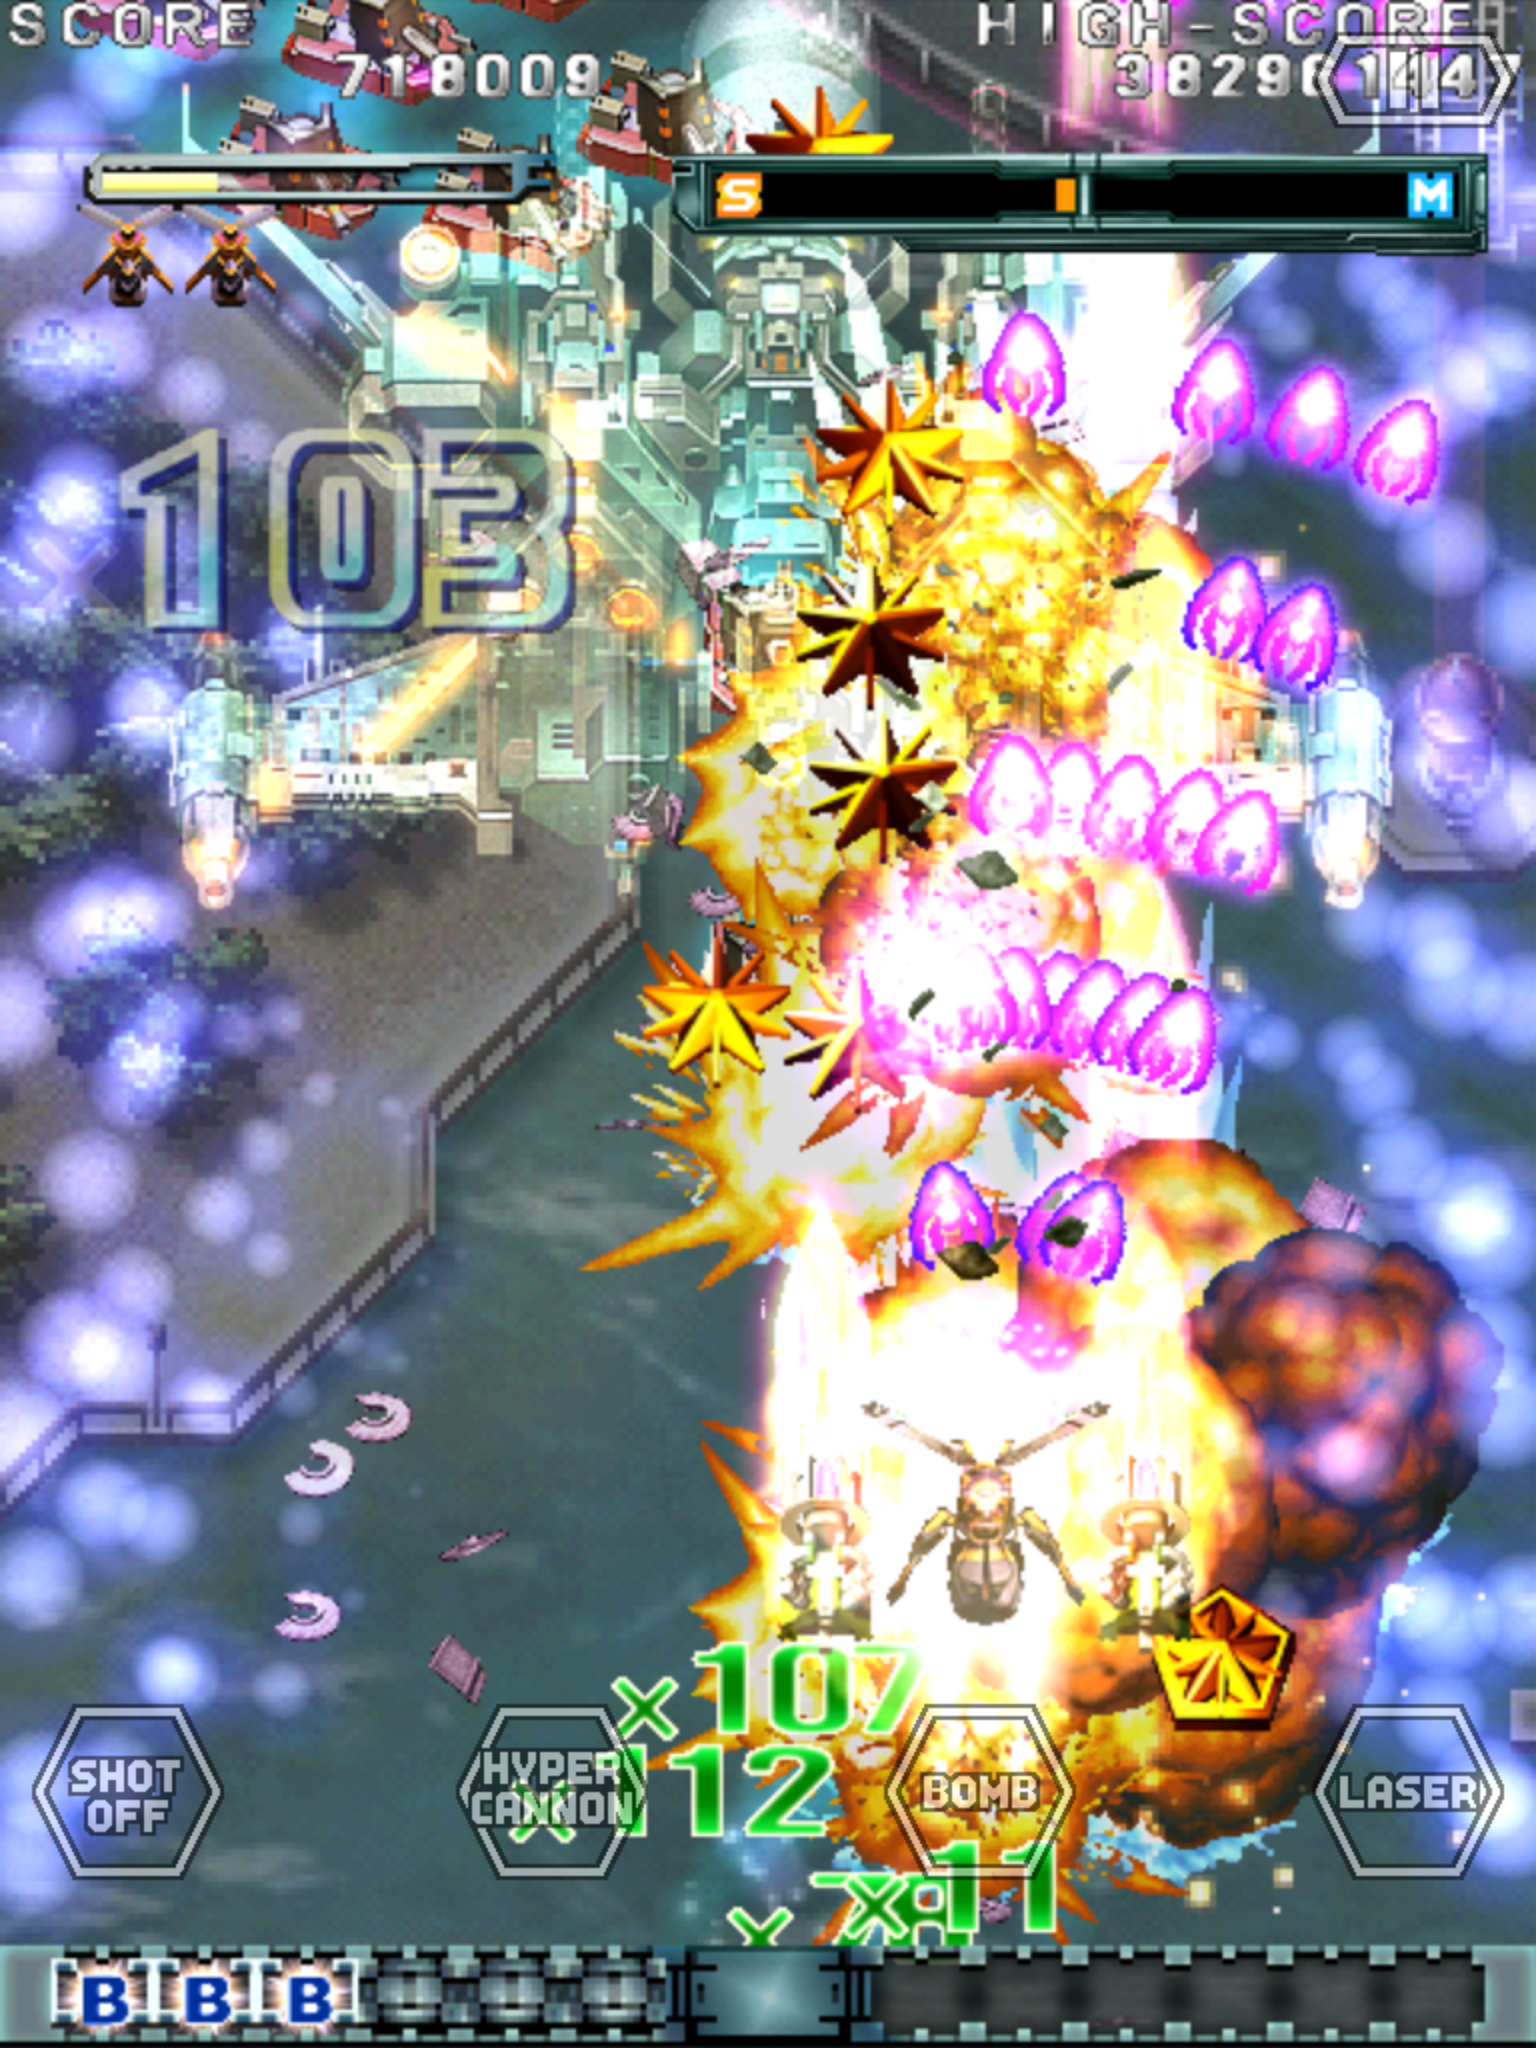
Daifukkatsu gets rid of the “P” and “MP” power-up items from previous DonPachi games, instead giving players fixed weapon strength throughout the game. The “B” bomb items are still present, as is the MAXIMUM Bonus they can provide. The hidden bee items make a return as well, though no longer important scoring wise, they do have some new functionality this time around. For starters, there are three types of bee items, all of which will boost the combo meter when collected. When initially uncovered, the bee item will be green, and after a few seconds it will flash white for an instant before becoming gold and eventually flashing back to green again. This process is repeated until the item is picked up. Collecting a green bee item will fill about one fourth of the player’s Hyper Gauge. Collecting a gold bee item is worth points multiplied by the number of bee items collected in the stage. Collecting the bee item while it’s flashing white is worth both green and gold bee icons, making it the preferred method of collection. The star items are also back, with a large and small variant for both aerial and ground enemies. The star items are worth 1/10th of the current combo bonus, sans the multiplier. They also add 5 or 10 points to the combo bonus, but really don’t affect the score too much overall.
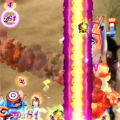
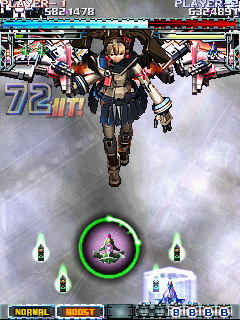
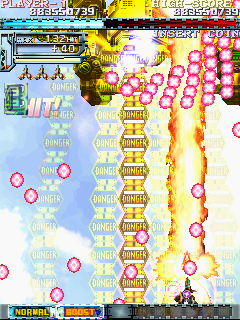
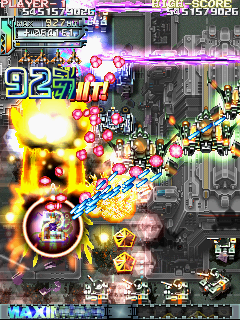
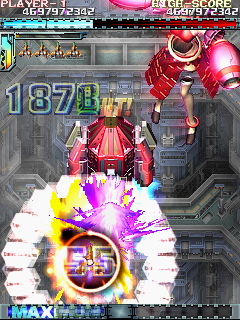
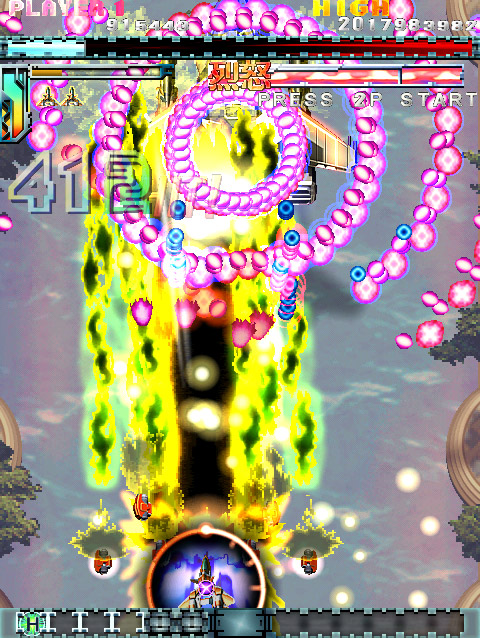
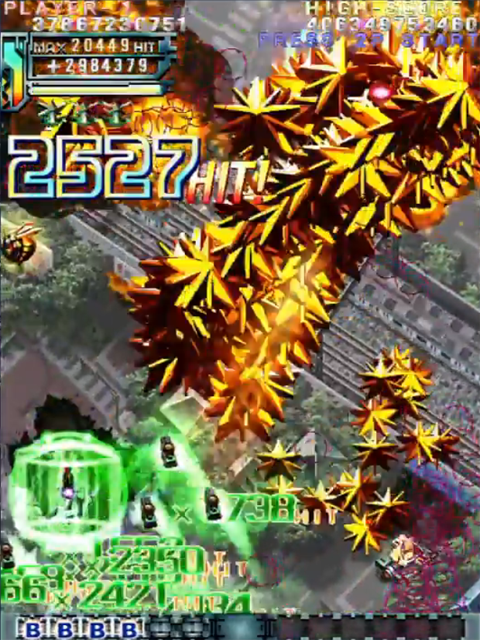
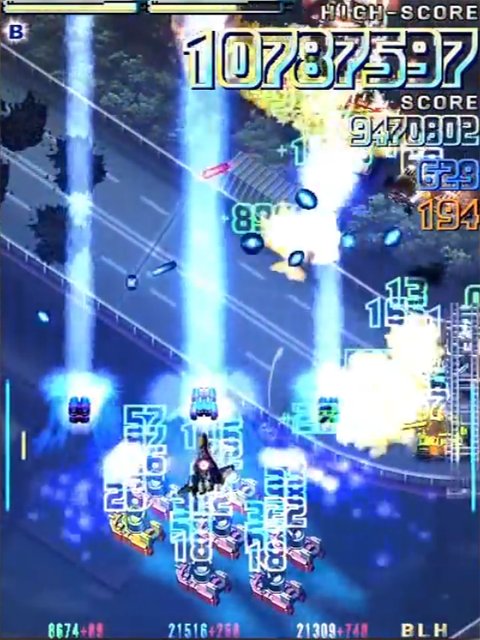
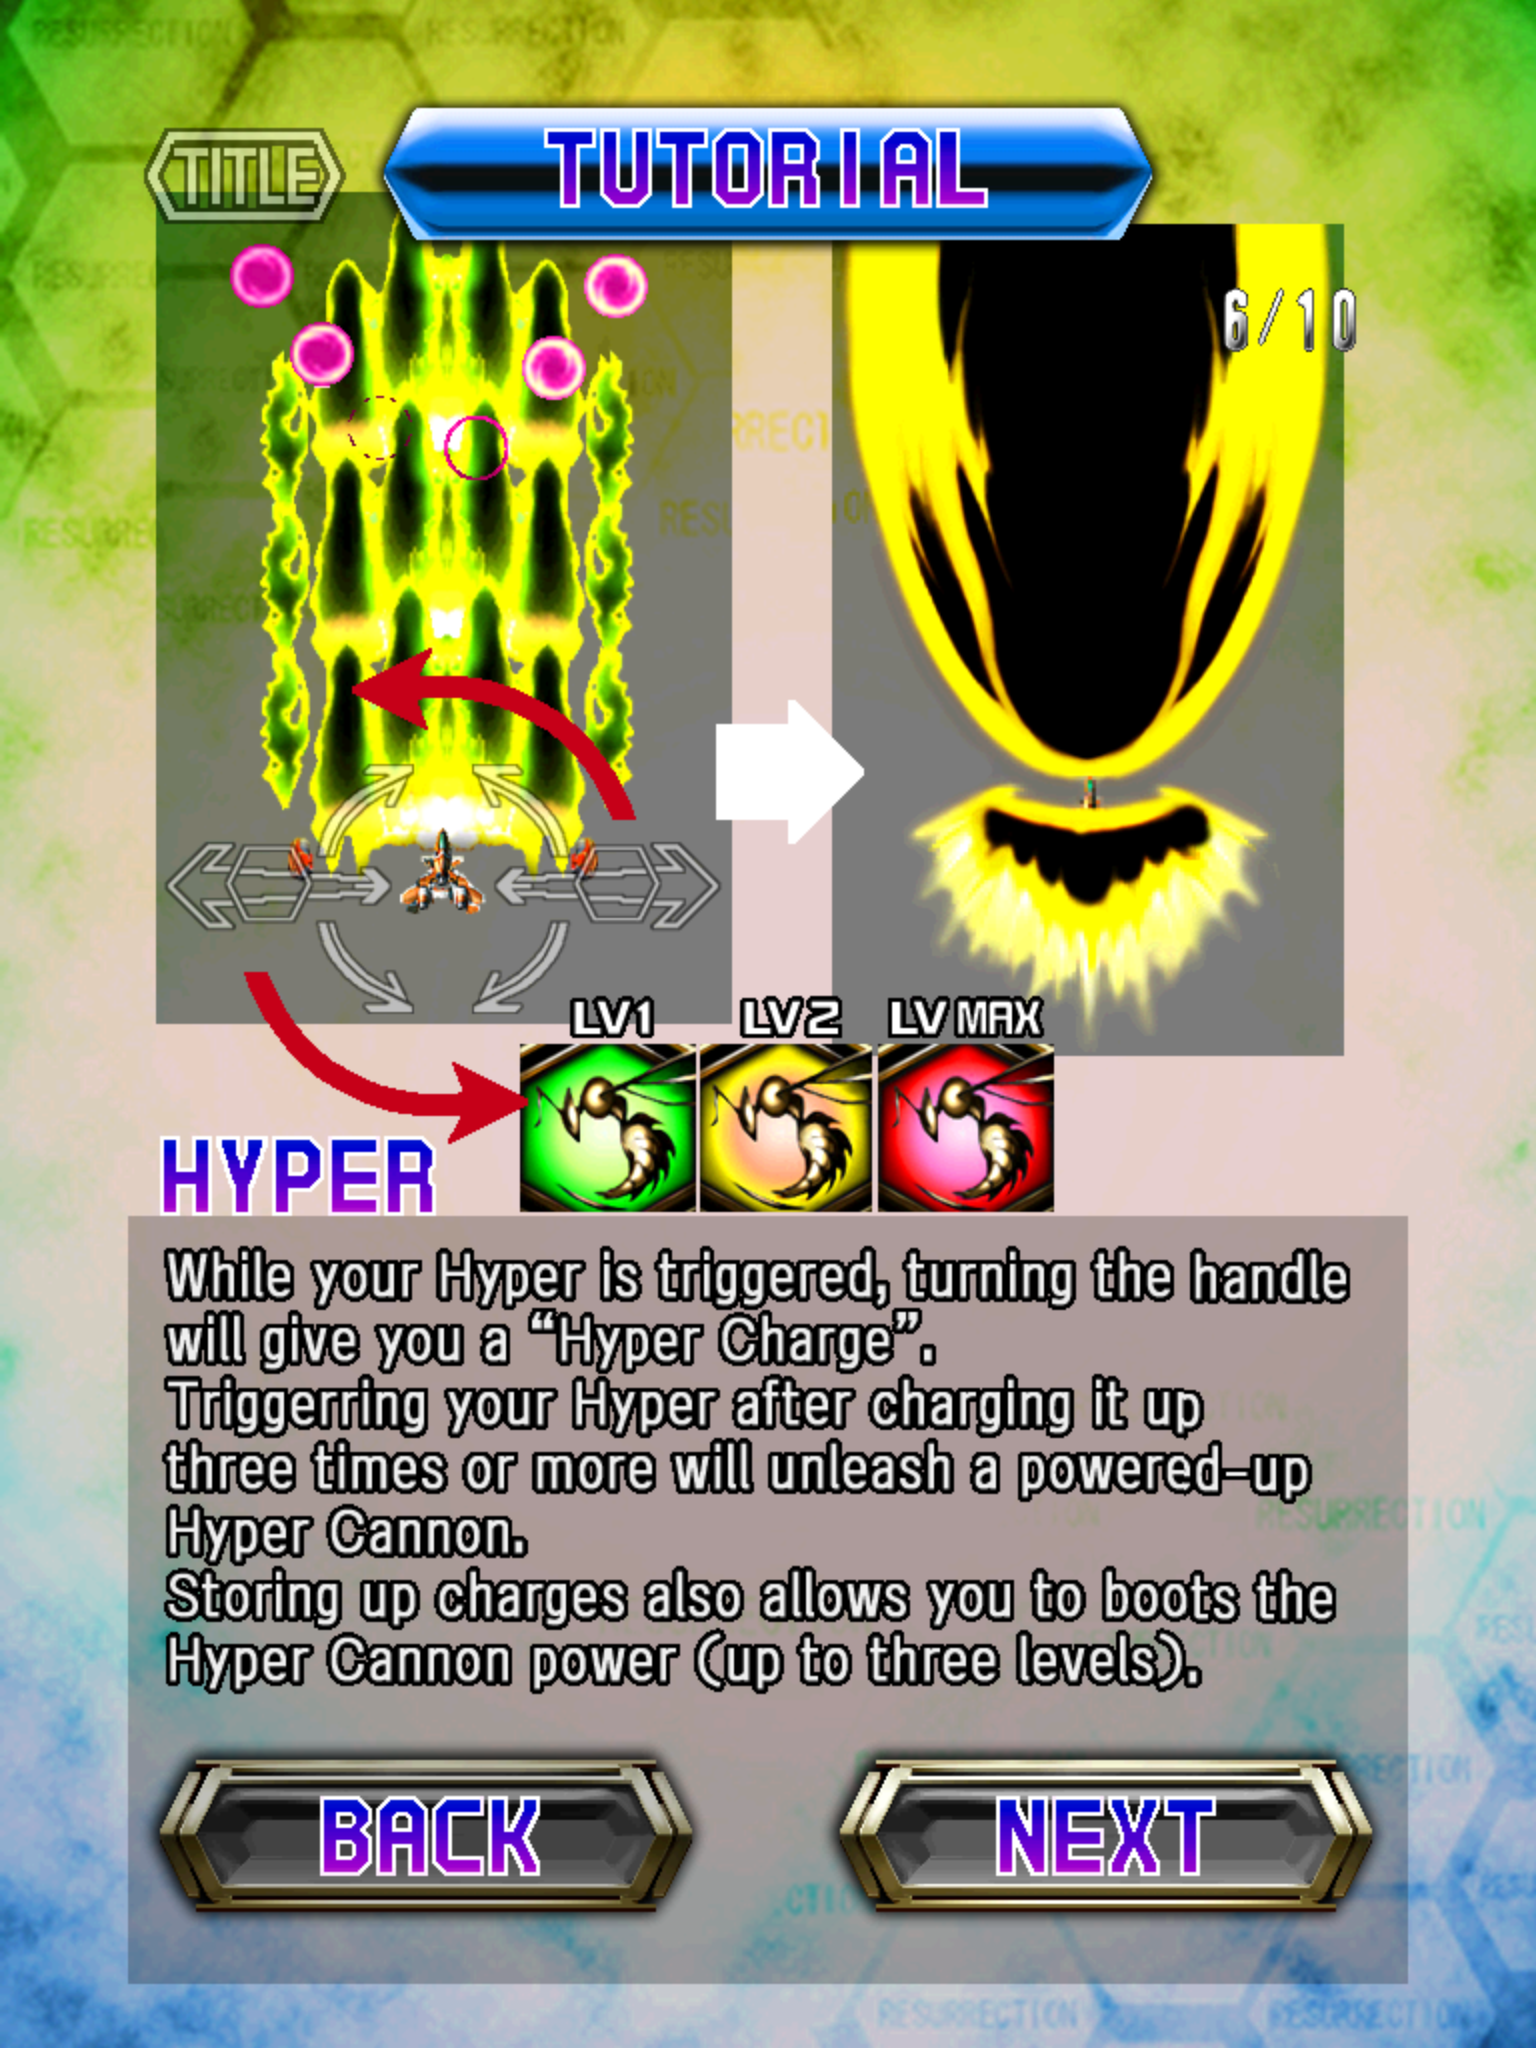
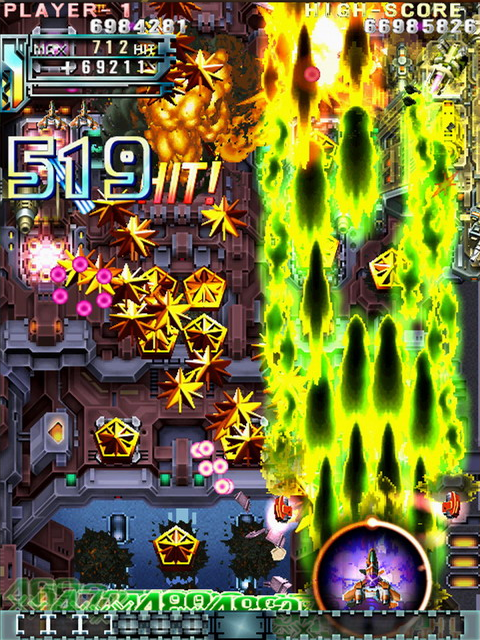
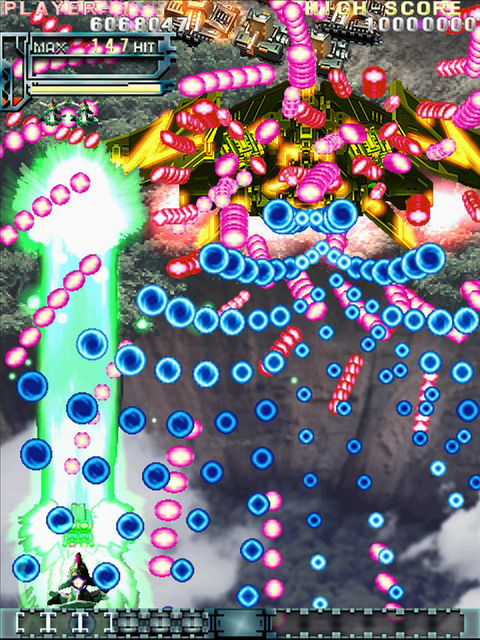
When the Hyper Gauge is full, players can press the Hyper button to activate the Hyper Counter, which strengthens their Shot and Laser. Upon Hyper Counter activation, enemies will fire more bullets, the player’s combo gauge timer will be completely refilled, and the player will be invincible for two seconds. A white ring will also appear around the player’s ship, which serves as a timer representing the duration remaining for the Hyper Counter. The player exits the Hyper Counter when the ring has fully disappeared. Upon exiting a Hyper Counter, all on screen bullets are canceled and the player gains another brief period of invulnerability. Bombing or getting hit will forcefully exit Hyper Counter. While Hyper Counter is active, players can destroy enemy bullets by hitting them with the Shot. If playing as Power Style and using Boost Mode while Hyper Counter is active, the player’s shots start as green colored projectiles, becoming yellow projectiles the after traveling a certain distance. The green colored shots cancel bullets faster than the yellow projectiles, and they turn the canceled bullets into star items. If the player cancels a certain number of bullets during a Hyper, a yellow “DANGER” hexagon will spawn and fire a laser at the player until Hyper Counter is over.
When activating a Hyper, a number appears over the player’s ship, this number is known as the Hyper Rank. During the first loop, the Hyper Rank always begins at 0, increasing by 1 with each use, with a maximum rank of 5. The Hyper Rank affects a number of different things, such as the strength and duration of the Hyper Gauge, how strong and fast enemy bullets are, and how quickly green shots become yellow shots in Boost Mode. Players can lower their Hyper Rank one level by dying, or if they are in the second loop, manually Bombing (or Auto Bombing if Power Style) will also decrease the Hyper Rank by one. Normally, the Hyper Counter is lowered at the beginning of every stage, but it is possible to carry over a Hyper Rank from one stage to the next by ending a stage in Hyper Counter. However, the Rank will return to normal after the carried over Hyper is finished.
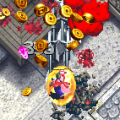
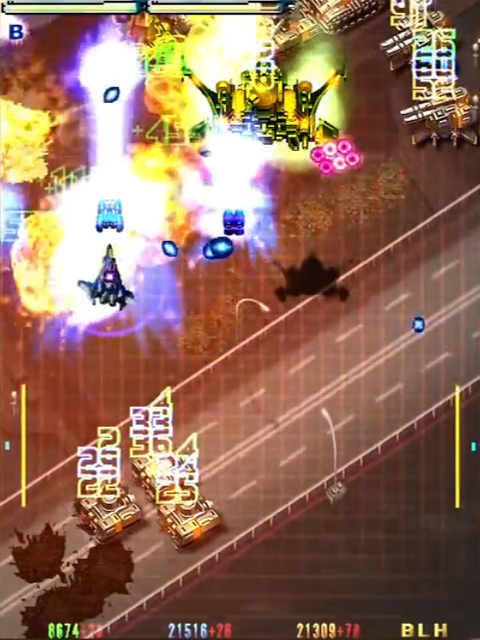
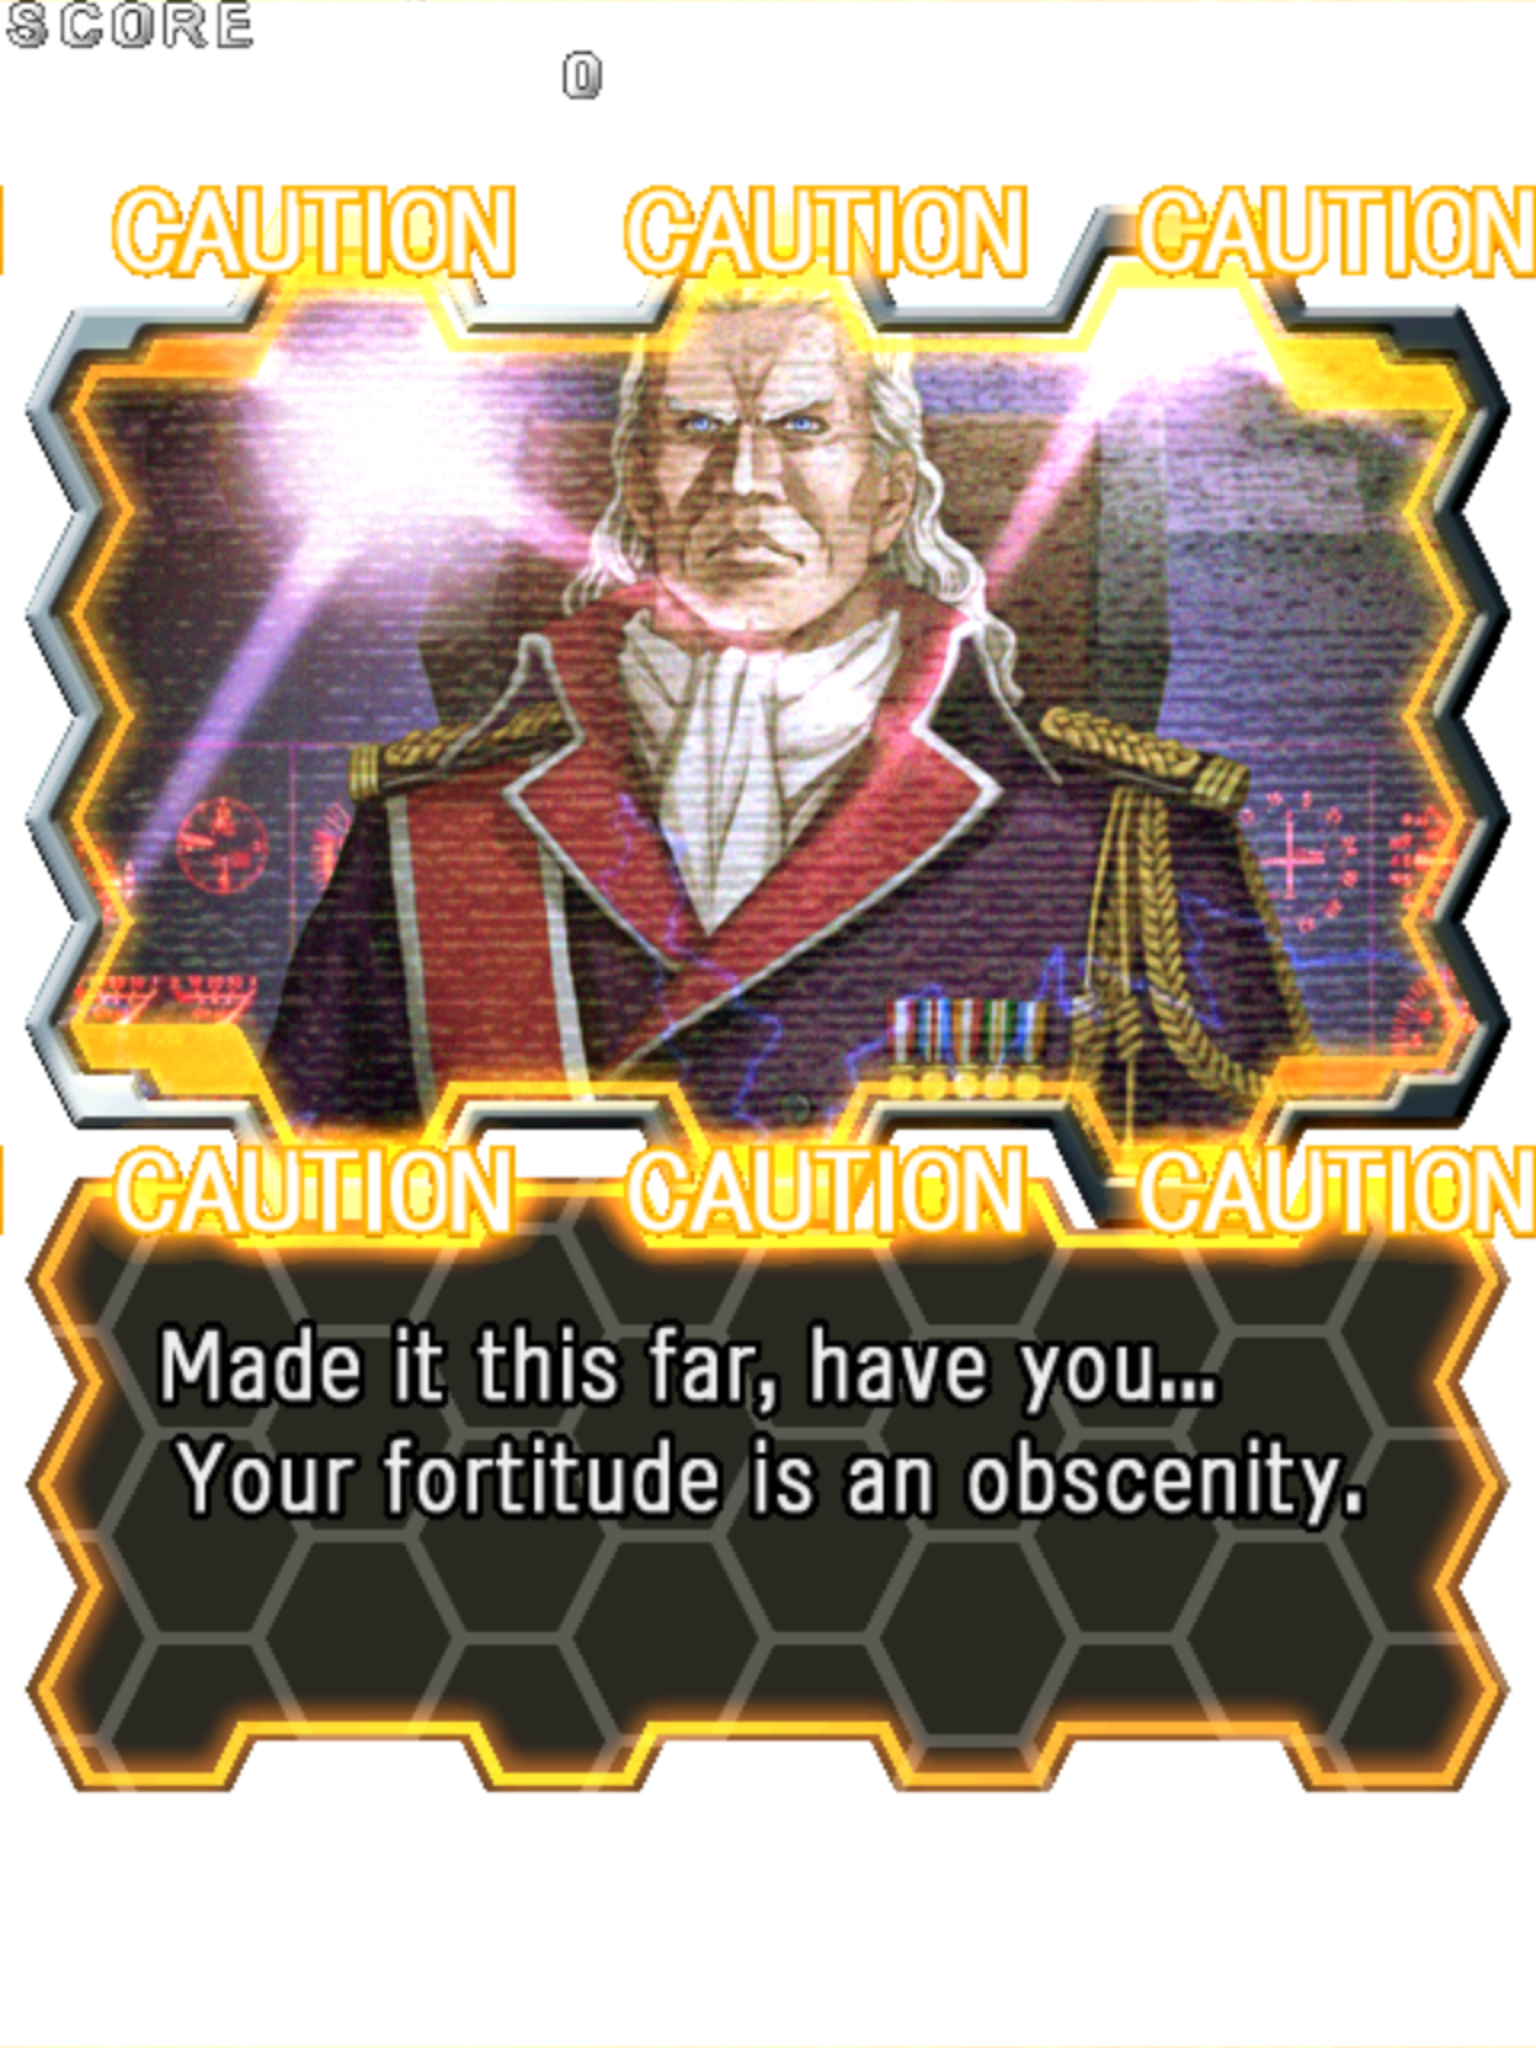
By destroying three specific silos near the beginning of the first stage before they are run over by the tanks, players can access a hidden midboss route. This hidden route replaces the Daifukkatsu midbosses with the boss enemies from Dodonpachi. The hidden boss route contains two additional hidden bee items as well as allowing for a higher score potential than the normal route. Once players enter the hidden route, they will remain on it unless they die during a stage (dying at a boss is ok), or fail to collect every bee item in the stage. If the player satisfies the requirements for the second loop, the Colonel will appear inform the player that their actions in the past have successfully allowed the Colonel to alter the future. He then asks the player if they would like to entertain his mechanical army (play second loop), or return to the present and rest (end the game). Daifukkatsu has two versions of the second loop: the Omote (open) Loop and Ura (hidden) Loop. To access the Omote loop, players must either collect 35 bee items, or not lose more than one life, and not use more than two bombs. To enter the Ura loop, players must collect all 45 bee items (this means that they must trigger the hidden Dodonpachi boss route), in addition to meeting the life and bomb requirements of the Omote loop. The Omote loop is the easier of the second loops, and after beating Stage 5 the second time, the player will only face the first hidden boss: Taisabachi. Completing the much harder Ura loop will have players face off against Taisabachi, and then the game’s True Last Boss: Hibachi, again provided they still meet the requirements to do so.
Scoring in Daifukkatsu
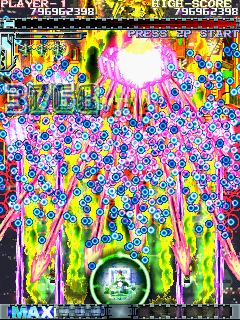
The main scoring system in Daifukkatsu is the GPS/chaining system from previous DonPachi games. The hidden bee items are still in Daifukkatsu, but now exist on their own scoring system unrelated to the chaining system. The combo gauge (located in the upper left corner) works just like it did in previous games: it is constantly draining, and can be refilled by destroying enemies. Collecting a bee item or activating the Hyper Counter will completely refill the combo gauge, and lasering big enemies will stall or hold the gauge at 10%. The combo chain will end if the gauge hits zero. Actually, that last part isn’t 100% true in Daifukkatsu. The chain will instantly end if the player has a full Hyper gauge, or is actively using a Hyper Counter when the combo gauge is empty (except during boss battles). Otherwise, the number of HITs in the combo will turn purple and rapidly decrease until it reaches zero or a certain amount of time as passed, after which the chain will turn red, signifying that the chain has ended. Bombing outside of the bosses’ WARNING sequence will also instantly break any active chains.
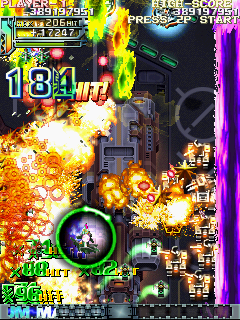
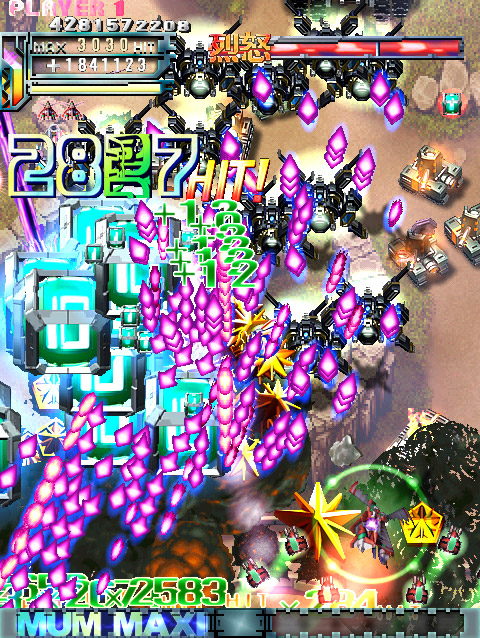
In addition to the HIT system, active chains also receive a combo bonus. This bonus is a running total of the value from each enemy or enemy part (or Laser damage) destroyed in the current chain. Each time the player increases their HIT counter, they also increase the combo bonus, whose value is added to the player’s score each time it increases. But, the real scoring bonuses come into play once the player has a full Hyper Gauge. While the Hyper Counter is not active, players will receive a score multiplier depending on the number of HITs in their chain. Having more than 500 hits activates a x2 multiplier, over 1000 triggers a x3 multiplier. The multiplier increases by one for every 2000 HITs after that, capping out at a x7 multiplier at 10,000 HITs. This multiplier is applied to all combo-related scoring aspects, such as destroying all or part of an enemy, as well as the combo bonus. The multiplier acts like the player destroyed multiple versions of the same enemy type. For example, if the player has a 1000 hit combo and a bonus of 10,000, and they defeat a 100 point enemy, they will earn (10,100 + 10,200 + 10,300 =) 30600 points. Additionally, although they only destroyed one enemy, their HITs will now be at 1,003, and their combo bonus will be 10300. Some enemies, such as the DANGER hexagons, bomb carriers, do not contribute to the combo gauge or HIT count when destroyed. Bosses and midbosses are also not affected by the multiplier.
While the chain system is the key to scoring in Daifukkatsu other scoring systems such as the MAXIMUM bonus and the golden bee items are still present, and contribute to a player’s total score. The MAXIMUM bonus adds 2,222 points times the current MAXIMUM multiplier every so many frames (dependent on the MAXIMUM level). The MAXIMUM bonus is available to all Styles, and is triggered by collecting a “B” bomb item when the player is fully stocked on bombs, or collecting the bomb item will cause them to be fully stocked. If the bonus is triggered via the latter method, the multiplier will begin at x1, however if it is activated via the former, it begins at a x2 multiplier. Regardless of how the bonus is triggered, collecting another “B” item while in MAXIMUM mode will increase the multiplier by 1, up to a maximum of x3. If the player loses the MAXIMUM bonus by using a bomb, the multiplier will decrease by one (but it cannot go below x1). Dying will reset the multiplier back down to x1. In addition to the MAXIMUM multiplier, the MAXIMUM mode awards its points via level, which starts at level 1 when the mode is first activated. Each time the player starts a stage with a MAXIMUM bonus active, their MAXIMUM level increases by 1, up to a maximum of 3. However, the level is reset back to 1 if the player dies. At level 1, the MAXIMUM bonus is triggered once every 1/20th of a second, 1/30th of a second for level 2, and once every 1/60th of a second while at MAXIMUM level 3. Daifukkatsu also awards a clear bonus at the end of every stage and loop, depending on the number of hits against the boss, the number of stars collected on the current life, and if the player died during the stage.
Scoring in Daifukkatsu largely depends on what style the player is using. It will take careful planning and routing for each Ship Type and Style combination to achieve respectable scores. That said, achieving and maintaining a high combo and combo multiplier are the key to achieving high scores. Ideally, players will want to use a Hyper Counter to give their combo an initial boost in HITs and bonus, after the first Hyper is over, continue to build more Hyper without dropping the combo, using it in key spots to further increase the number of HITs in the chain. The goal should be to reach 10,000 HITs (and a full Hyper Gauge) before the midboss. After the midboss, the player’s main goal is to now “cash in” their multiplier, riding out the rest of the stage without dropping the combo or Hypering. It’s not easy, but successfully doing so will eventually award the player with millions of points for each enemy destroyed! But remember, that the multiplier is not in effect during Hyper Counters, so it is best to kill the larger enemies (which tend to be worth more points) after the Hyper Counter ends, hopefully with a full Hyper gauge to boot. Players are going to want to trigger the Dodonpachi midbosses for a number of reasons. The extra bee medals are nice, but the real reason to trigger the hidden route is that they extend the length of the stage, creating more enemies and therefore potentially millions of points. Another little trick is to “smuggle” a Hyper over from stage to stage. This tactic is great for a huge combo boost at the start of the next stage. The best way to “smuggle” a Hyper is activate a Hyper Counter right before players destroy the boss of the previous stage. A special note to Power Style players, when playing as Power Style, a green aura can be seen around the player’s ship. (It’s easiest to see after a few Hypers, and not firing.) Destroying enemy bullets (via the Hyper Counter) while they are in this green area will produce star items, as well as prevent the current chain from dropping. Destroying bullets outside of this green area will not spawn the star items, and therefore leave the player’s chain much more vulnerable.
Music
Dodonpachi Daifukkatsu‘s music was composed by Manabu Namiki, Azusa Chiba, and Yoshimi Kudo. The music itself is very well done and varied, ranging from the upbeat “Dividing Road of Fate” to the slower “Shadowing World”. Each track is well done and goes well with the stage. However, there are two tracks in particular that stand out, the first being the track that plays while facing off against Taisabachi, “Longena Cantata”. This track is very nice change of pace, being a vocal composition with an oppressive march in the background that goes well with the encounter, in addition to making the sheer chaos that is Namiki’s track for the TLB:”]-[|/34<#!” (Hibachi) even more effective. That song is a blistering 200+ bpm, with the entire Hibachi fight being choreographed to the BGM. The track itself starts with a brief count off, followed by unintelligible gibberish and a simple but effective bass line and distinct drums that relentlessly pound away. It’s a fast and overwhelming sensory overload, much like the fight itself. Many of the songs are able to stand by themselves, and are worth listening too outside of the game. But some tracks, like “]-[|/34<#!”, are really special when accompanied by the visuals of the game.
Final Thoughts on Daifukkatsu
If Daioujou was about avoiding bullets, then Daifukkatsu is about canceling bullets; and it’s those canceling mechanics that make Dodonpachi Daifukkatsu a much easier game to complete than Daioujou. The game is really good, with incredible sprite work, great music, and challenging gameplay. It recently became playable on MAME, though the emulation may not be arcade-perfect as of writing. Speaking of the arcade version, that version in particular has some quirks that may offset casual players. Specifically, players cannot change their ship type or style upon continuing, even if they let the timer completely run out (during 2 Player mode), and jump back in. The player’s Laser weapons also flicker when used at the same time in two player mode. These are very minor things that don’t really affect the gameplay, but players should at the very least be aware of them. Cave released a port of Dodonpachi Daifukkatsu Ver. 1.5 to the Xbox 360 November 25, 2010. This port is region-locked to Japan, and can only be played on a Japanese Xbox 360. However, Rising Star Games published a region-free version of the port for PAL territories in November 2011 under the title of Dodonpachi Resurrection. Information about this port and what it contained is detailed after the Dodonpachi Daifukkatsu Black Label article. Additionally, Cave released an iOS and Android version of the game, which is detailed with the other Cave smartphone ports and releases on the next page.
Dodonpachi Daifukkatsu Black Label(怒首領蜂 大復活 Black Label) – Arcade, Xbox 360, Windows (January 20, 2010)

“At last, it’s time for you to die. Farewell.”
The overall game changes found in Dodonpachi Daifukkatsu Black Label are actually closer to those done for Mushihimesama Futari Black Label than Dodonpachi Daioujou Black Label. Daifukkatsu Black Label was programmed by Shinobu Yagawa, known for being the main programmer on Raizing’s Battle Garrega and Armed Police Batrider, as well as Cave’s Ibara and Pink Sweets games. As such, the game plays quite different than Tsuneki Ikeda’s Daifukkatsu. The biggest change stems from a new user-controlled rank system, with the removal of the second loop coming in at a close second. The resulting game is a single loop run of Daifukkatsu full of crazy right from the get-go. The arcade version of the game would see a very limited release of about 100 copies, but it would eventually find its way onto the Xbox 360 as DLC for the Daifukkatsu Ver. 1.5 port, or as a standalone disk that featured an exclusive Black Label Arrange Mode, dubbed “Ketsuipachi” by the fans.
Black Label’s Gameplay
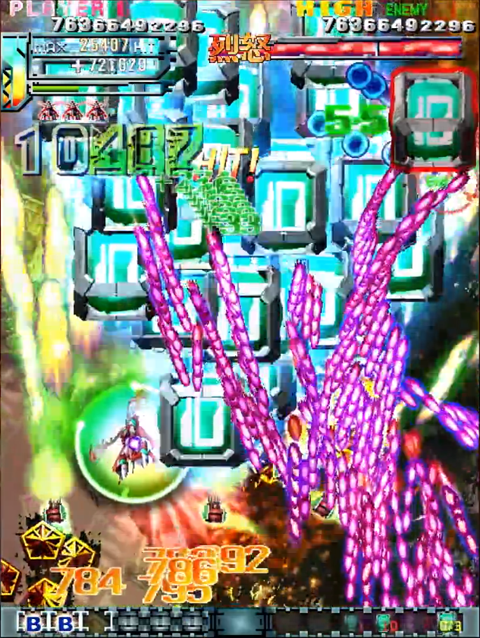
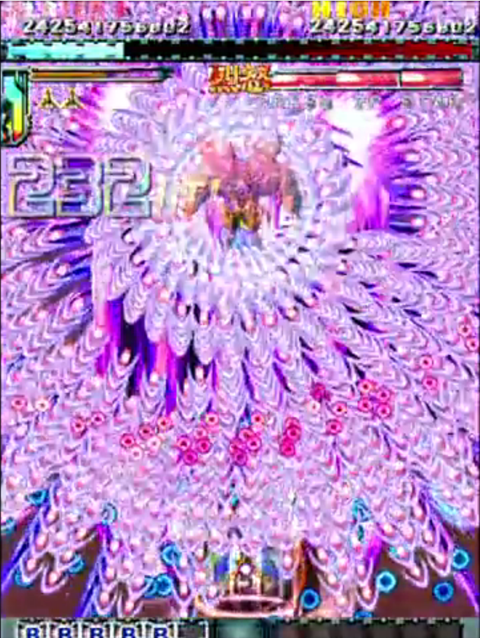
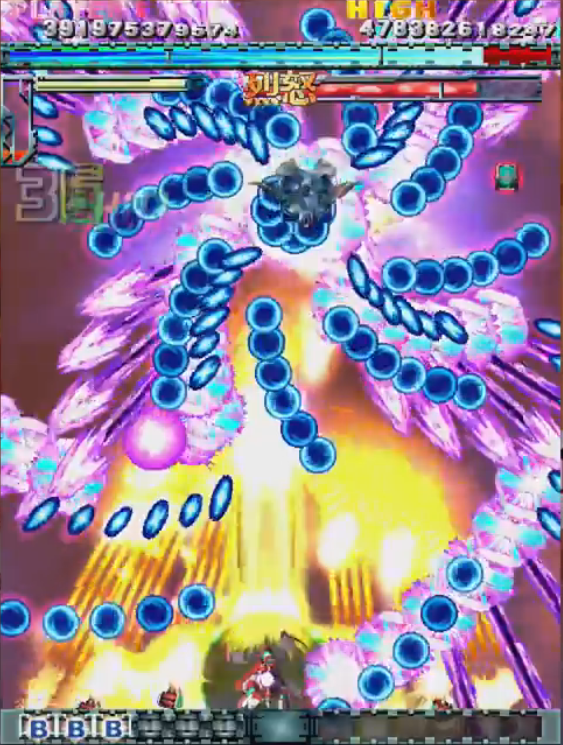
The controls of Black Label are the exact same as the original Daifukkatsu, with one exception. Players can now fire their Shot options and Laser simultaneously by holding down the A and Auto-Fire buttons at the same time, creating a sort of double attack. A new system titled Red (or Reddo) Mode, has been added to Black Label as well. Red Mode acts as a player-adjustable rank system, something that Yagawa’s games are known for. Using the Shot and Laser simultaneously will cause the Red Mode Gauge to increase, which, after reaching a certain threshold (around 75%), will cause players to actually enter Red Mode, making the game much more difficult. When Red Mode is active, the bar itself will turn red, and display “烈怒” or the word “RED” on the left side of the bar. Because of the new Red Mode, things such as how the score of HIT combos are calculated, the speed at which the Hyper Gauge is filled, and the conditions to fight the hidden final bosses, have all been altered to take advantage of this new system in some way. For example, the Hyper Gauge now increases very slowly when the player is not in Red Mode, and the duration of each Hyper Counter has been decreased for all Hyper Ranks. Another key change is how bullets are canceled. Most of the larger enemies will now cancel their own bullets when destroyed, and collecting a bee item cancels all bullets and lasers on screen when collected.
The ships in Black Label haven’t changed from their Daifukkatsu incarnations, but what has changed is the Style selection. Players are still able to choose from the Bomb, Power, and Strong Styles, which act as they did before, but the Styles now additionally act as Easy, Medium, and Hard modes, with the game’s new TLB only available to Strong Style players. Enemies will attack with their first loop patterns on Bomb and Power Styles, with Strong Style causing them to switch to their Omote patterns (complete with suicide bullets). Another difference is that Bomb and Strong Styles start on the regular midboss route by default, and can enter into the hidden route just as they would in Ver. 1.5, but the Power Style will always face the hidden midbosses. After selecting the Ship Type and Style, players can now choose to turn the Auto Bomb feature on or off, a decision that drastically affects certain gameplay systems for all Styles. If the Auto Bomb feature is enabled, the Bomb and Hyper Gauge and Hyper Counter will work exactly as they did in Daifukkatsu. But, when the Auto Bomb feature is turned off, the player’s bombs now double as Hyper Counters that can be used at any time (so long as they have one). Additionally, the Hyper Gauge now adds an additional bomb (and can trigger the MAXIMUM bonus) whenever it is filled for all styles. This means that Bomb and Strong Styles will always spawn with at least three Hyper Counters, while Power Style players can only have one Hyper Counter stored at any given time. Power Style players will also need to fill the Hyper Gauge before they can use their Hyper Counter, as they do not spawn with any bombs. Also, Hyper Counters are no longer canceled by bombing, instead they can be manually canceled at any time by pressing the Hyper button again. This is good for quickly reducing the Red Mode Rank, raising Hyper Rank, or it can even serve as a quick-pseudo bomb to clear the screen of bullets. Note that players will not lose any Rank if they cancel a Hyper Counter during the WARNING screen before a boss.
There are a total of four levels of Red Mode rank, depending on how full the Red Mode Gauge is. The higher the Red Mode rank level, the denser enemy bullet patterns are. Note that during boss battles, the boss must finish its current pattern before it will switch to a higher or lower rank level. The level thresholds for the rank are as follows: Level 1 is between 0-49%, Level 2 is between 50-74%, Level 3 is 75-99%, and Level 4 is when the gauge is at 100%. There are a number of ways to decrease the Red Mode Gauge, both instantly and over time. The Red Mode Gauge will start to decrease a few seconds after the player stops using the Shot and Laser at the same time. This drain will occur even while Hyper Countering. The drain can be slowed down by using the Laser, or halted by using the Shot and Laser buttons simultaneously. Using the Shot or simply doing nothing at all is the fastest way to drain the Gauge in this manner. Upon exiting a Hyper Counter, the Red Mode Gauge is instantly reduced by fifty points, regardless of method used. Bombing of any type, or dying will reset the Gauge to zero. Oddly enough, manually using a bomb causes the Red Mode Gauge to max out for the duration of the bomb, with the Gauge being reset back down to zero once the bomb ends.
Since there is no second loop in Black Label, players can now face off against Taisabachi, sorry, “Supreme Weapon of Extreme Hellish Annihilation – Golden Disaster”, as he is now known; along with “Supreme Killing Weapon – Hibachi”, or the new True Last Boss: Zatsuza, at the end of fifth stage. Zatsuza appears to be a palette swap of Hibachi, but comes with his own attack patterns that somehow manage to one-up Daifukkatsu‘s Hibachi in terms of… everything. The conditions for facing the hidden bosses have been changed, and no longer require bee collection of any sort. To face Golden Disaster, players cannot use more than two bombs during the first five stages, and destroy at least two bosses with a full Red Mode Gauge. To fight Hibachi, players cannot die more than once, nor use more than two bombs in the first five stages. Additionally, players must destroy all bosses with a maxed out Red Mode Gauge. Zatsuza, the new TLB, can only be challenged on Strong Style. To face off against this awesome opponent, players must meet the requirements to fight Hibachi, and destroy Golden Disaster without dying. The reward for destroying the first phase of Zatsuza is 10 billion points, with a generous 100 billion points awarded for completely destroying him.
Scoring
Black Label will have players seeing stars, lots of them; which is good, because the star items are key when attempting to score big points. Of course, the game is still based around the chain system, which still retains the additional point multipliers present in Daifukkatsu, though the multipliers only kick in while Red Mode is active. The chaining system has undergone a few more changes since Daifukkatsu, with players no longer gaining HITs from shooting enemy bullets. Instead the HIT counter can only be increased by shooting enemies, or canceling bullets by other means, such as grabbing bee items or destroying enemies that cancel their own bullets. Many enemies will cancel their bullets if they are destroyed while using the Shot and Laser. Destroying enemies will increase the current value of the combo chain, but the smaller enemies have very little impact overall. The larger enemies, however, can raise a chain’s value by several tens if not hundreds of thousands of points. For example, at the start of Stage 2, the tiny aerial popcorn enemies are only worth about 200 points, whereas the two large enemies are worth 300,000 points each. That’s a 149,900% increase in points, and there are two of them! In Black Label, there appear to be only three ways to break a combo chain: using any type of bomb, dying while using the Hyper Counter, or having the chain meter empty out while a Hyper Counter is active. Although the Auto Bomb would normally break a combo, if the player activates the Hyper Counter while the Auto Bomb is going off, they can save their combo, and prevent it from breaking. Note that this only works for players who have Auto Bomb set to ON.
When going up against bosses, it’s best to damage them as little as possible until Red Mode is active. This is because hitting the boss with the Shot and Laser combo awards huge points if the player is in Red Mode. Additionally, destroying a boss at max rank with the Shot and Laser will have them release larger, more valuable stars. It’s quite common to almost double the stage’s score by defeating the boss with a high chain. There is also the concept of “milking” the bosses for extra points. This is done by shooting invincible parts during boss battles, such as using the Laser Counter, or attacking the satellite pods that appear when fighting PERFECT ☆ or Ray’n. Be careful though, as this can cause the boss to fire extremely vicious patterns that are very hard to avoid. When these attacks are triggered depends on the Ship Type and Style the player is using, however. The main takeaway from all of this, and the key to scoring big points in Black Label, is by being in Red Mode as much as possible.
“Ketsuipachi”
Daifukkatsu‘s Black Label Arrange mode is one of the possible results that can occur when someone takes Ketsuiand smashes it together with Dodonpachi Daifukkatsu Black Label. As one might expect, the two don’t perfectly blend together, causing the systems mix together, but still remain separate. But somehow, despite all odds, this concoction manages to produce one hell of a ride. Because the components are able to work independently of each other, this Arrange Mode has been dubbed “Ketsuipachi” (a portmanteau of Ketsui and Dodonpachi) by the fans. Ketsuipachi is only available on the disc versions of Black Label on the Xbox 360, which is sadly region locked to Japan.
Gameplay in Ketsuipachi is a combination Ketsui and Black Label operating at the same time in a game of Dodonpachi Daifukkatsu Black Label. After completing a stage, the screen goes through the standard Black Labelcomplete screen, followed by an additional Ketsui styled one. Players can only control the Tigerschwert fighter from Ketsui in this mode, but it has two extra options and the ability to use Hyper Counters. The ship itself acts much like Strong Style with Auto Bomb turned off, meaning that the players’ bombs double as Hyper Counters. Players will still use four buttons to control the Tigerschwert, which acts like its Ketsui counterpart. Holding down the A button will fire the Laser, and enable the Lock-Shot. Pressing the B button will release a bomb, the C button acts as an Auto-Fire, which ends up being a very Wide Shot, and the D button is the Hyper Counter. Hitting enemies with the Laser while using the Lock-Shot will cause the player’s options to focus their fire on that target until it is destroyed, so long as the button is held down. At its core, Ketsuipachi is still Black Label, retaining the Red Mode, chaining system, enemy placement, Hyper and Laser Counters, etc. The main elements taken from Ketsui are the player’s ship, the Lock-Shot system, the Cube system, and the TLB Evaccaneer DOOM.
The Red Mode Gauge in Ketsuipachi has changed slightly from the original Black Label version, no longer increasing when both Shot and Laser buttons are held down. Instead, the Red Mode Gauge fills very rapidly when using the Laser or Lock-Shot, and decreases when using the Shot or collecting star items. Like original Black Label, players will want to be in Red Mode, or have a maxed Red Mode Gauge as much as possible. Under the Red Mode Gauge is the box chain system taken straight from Ketsui, though the highest box level is [10], rather than [5]. Destroying enemies in Ketsuipachi will spawn a box, the value of which depends on how close to the enemy the player was when it was destroyed. Destroying an enemy from far away will generate a [1], while destroying it at point-blank generates a [10]. Collecting a box item will either start or extend a box chain. On the right side of the screen is the current box value, and how much time is remaining on the current box chain is located to the left of the box item. There will also be a circle around the player’s ship while the box chain is active. This circle is just another representation of how much time is remaining in the current box chain. Players can see how many box items they have picked up for each type in the bottom right corner of the screen, but it is very small.
The HIT counter multiplier is still in Ketsuipachi, with the most important numbers are the x6 multiplier for having an 8,000 HIT combo, and the x7 multiplier for having at least a 100,000 HIT combo, though the latter isn’t really possible outside of Stage 5, so just focus on having at least 8,000 HITs in the current chain. Don’t worry, it is very easy to generate a large amount of HITs in Ketsuipachi, so an 8,000 HIT combo is very easy to achieve. The HIT multiplier is only applied when the Red Mode Gauge is maxed out, or the player is using a Hyper Counter. Dying only drops the HIT count by 33% in this mode, rather than breaking or resetting the chain. The Hyper Rank is reset at the start of every stage, just like it is in the original Daifukkatsu.
Scoring In Ketsuipachi
Scoring in Ketsuipachi is a little odd, since the systems from Ketsui do not directly contribute very much to the overall score total. The box chain system is used primarily for gaining extra bombs/Hyper Counters as each [10] item refills a small amount of the Hyper Gauge. Furthermore, collecting any of the box items will increase the HIT counter by its number value. Therefore, the first objective in scoring is to increase the hit counter as high as possible, as quickly as possible. When a box chain is active, using the Laser/Lock-Shot will cause more cube items to appear, but it will also drain time remaining on the box chain faster than just using the Wide Shot. Activating a Hyper Counter while having a box chain higher than [1] will convert all enemy bullets onscreen into cubes of that value. By utilizing this system, players can quickly boost their HIT counter by waiting until the screen is filled with bullets, destroy an enemy at point-blank, thereby creating a fresh [10] chain, immediately followed by activating a Hyper Counter, which will convert all onscreen bullets into [10] items. However, this doesn’t really generate many points. The real way to get points is to collect the Large stars, similarly to the scoring system from the original Black Label.While there are multiple ways to generate small stars, they aren’t really worth much, instead focus on generating large star items for the big points. There are three ways to generate large stars in this mode: by activating a Hyper Counter while in Red Mode with no box chain; being in Red Mode when a Hyper Counter ends naturally (timed out); or by collecting a bee item just as it flashes white, which will all cancel all onscreen bullets into large star items. When it comes to boss battles, players should either destroy the boss with the Red Mode Gauge fully maxed out, or while using the Hyper Counter, as this will cause the boss to spawn special large star items that will have the boss’ point value added to them, making them worth significantly more than the large stars generated during stage. It is also best to destroy the midbosses in the same manner as the bosses, because they are actually the most valuable enemy in every stage.
Of course, all of this is moot once the player faces off against the game’s new TLB: HIVAC (Hibachi + Evaccaneer DOOM), due to the absurd amount of points he’s worth. Skilled players can easily TRIPLE their entire score from the first five stages. For example, in the Ketsuipachi video in the Links section, player sinmoon goes into the HIVAC fight with 1,354,795,882,400 points, and exits the fight with 4,709,156,847,607 points.
Music
Black Label comes packed with all new music, and it’s really good. The music was done by four Basiscape composers, Manabu Namiki, Yoshimi Kudo, Noriyuki Kamikura, and Azusa Chiba. The music in Black Label starts off strong with the new select theme “Sally”, and doesn’t let up until the credits roll. Every track manages to one-up its predecessor completely. Each track is very good, and contains an “A” and “B” version (for the “Normal” and “Ura” versions). But then comes the Stage 4 track,”Presentiment”, which may just be one of the best tracks on the entire album. The track manages to match the action on Stage 4 so, so well. They also removed the dissonance caused from “Longhena Cantata” when fighting Taisabachi, and replaced it with a bumping electro track featuring samples from other Black Label tracks. Hibachi’s remixed track “Mercilessness” somehow manages to become even more chaotic than it was in Daifukkatsu. And then the new TLB track “Zatsuza” pushes it to the limit, with a blistering 240 BPM rendition of “]-[|/34<#!” from Daifukkatsu, combined with the normal and hidden route versions of the Stage 3 track “Flotage” playing at the same time. It’s quite chaotic, and is over almost as soon as it starts. Dodonpachi Daifukkatsu Black Label has one of the finest OST’s out there, and is most definitely worth a listen.
Ketsuipachi‘s music was composed by Manabu Namiki, but was actually arranged by Jake “Virt” Kauffman, known for composing the music to a number of WayForward games. This arrange isn’t his first foray into Cave shmup arrangements either, having contributed to the Ketsui Arrange album two years prior. The music itself is all remixed versions of Ketsui‘s original songs. The tracks are well done, but nothing really stands out, especially when compared to the outstanding Daifukkatsu Black Label soundtrack.
Final Thoughts on Black Label
Black Label is a very fun game, and is a very different beast than the original Daifukkatsu. Most players usually always have the Auto Fire button held down, with the Laser button only being pressed (overriding the Auto Fire) when necessary. Black Label manages to encourage such play with its simultaneous Shot and Laser mechanic. The ability to manually manipulate the game’s difficulty is an interesting mechanic, as is having it tied to the new Shot and Laser ability. It’s a smart decision that allows the new system to become an integral part of the game. The music’s pretty great as well, it alone being worth a play.
The physical releases of Daifukkatsu Black Label and Ketsuipachiare only available via the stand alone Xbox 360 release of Black Label or the double pack. Both of which are Region locked to Japan, and can only be played on a Japanese Xbox 360. Ketsuipachi is a great arrange mode, possibly one of the best ones Cave has come up with, even if the TLB breaks the scoring system. The Arrange Mode (Ketsuipachi) is the only reason to pick up the disc version of Daifukkatsu Black Label, as the standard Black Label is available as DLC for the Ver. 1.5 port, even in the PAL release.
Blackl Label Links:
Black Label Official Site
DFK Black Label Guide An excellent thread detailing Black Label’s mechanics
DFK BL Type-B POWER Superplay A very nice DFK BL run by Rechiku
TLB Demo A video showing Golden Disaster, Zatsuza, and Hibiachi, along with a safe spot on Hibachi
Black Label OST YouTube Playlist
KetsuiPachi Links:
Ketsuipachi Superplay An amazing superplay with excellent commentary
Ketsuipachi OST YouTube Playlist
Dodonpachi Daifukkatsu Ver. 1.5 (怒首領蜂 大復活 Ver. 1.5) / Dodonpachi Resurrection – Xbox 360 (November 25, 2010)
In 2008, the Dodonpachi series underwent a “Grand Resurrection” (Daifukkatsu) in Japan. Cave came out swinging with a game that took some of the best elements from their other shooters and produced a single, expertly crafted game. Sadly, it seemed like this “Great Resurrection” would never make its way overseas. Fans of the shoot-em-up genre though, are used to this sort of deal, but Cave has managed to make a couple of their Xbox 360 ports Region-Free, allowing for players to play their games on a NTSC, PAL, or NTSC-J console without issue. So when Cave released Daifukkatsu Ver 1.5 for the Xbox 360 in November 2010, imagine the sadness some felt as the game could only be played on a Japanese Xbox 360. Things only got worse when Cave went on to release Daifukkatsu Black Label, Dodonpachi Daifukkatsu Platinum Collection and a Daifukkatsu / Black Label Double Pack, all of which were region locked to Japan. Perhaps Dodonpachi‘s resurrection wasn’t so grand after all? But then came a publisher, Rising Star Games. They announced that they would be translating and publishing the game under the translated title of Dodonpachi Resurrection in PAL territories in November 2011. What’s more, the Resurrection would only be available as a “Deluxe Edition”, which included the Do-Don-Pachi Daifukkatsu Arrange album at the cost of a normal retail game. But best of all? Resurrection would be region free. Finally, fans outside of Japan would have a chance to experience Dodonpachi‘s “Grand Resurrection”, and thankfully, it was well worth the wait.
Features of The Port
Like Cave’s other Xbox 360 ports, Resurrection features updated higher resolution graphics, a variety of gameplay modes, and various other features. Including the DLC, Resurrection contains the most gameplay modes of any Cave release to date, with not one, but two different arrange modes (Arrange A and Arrange B), an Arcade Mode (Xbox 360 Mode), and an Xbox 360 Novice Mode. Then, with DLC, players can access a Black Label Mode, a Black Label Novice Mode, and a special Ver 1.51 Mode, which was previously only playable at Cave Matsuri 2010. Each mode can be played in one of two ways: Play and Score Attack. Selecting Play allows players to continue after dying, and restart the current stage at any time, either through the menu, or by pressing the Select button. Score Attack Mode does not allow restarts or continues, but does allow players to upload their scores and replays to the global leaderboards, provided they have an internet connection. Both modes allow players to record and save a replay of their runs to their hard drive or external storage, but restarting a stage in Play will disable this functionality for that run. The replays are just input recordings, and are quite small as a result. Players can view replays via the Replay Data option in the main menu. During playback, players can fast forward the replay with the X button, and slow it down with the Y button. There are four different speeds for fast forwarding and slow motion. Pressing the A button will return the replay to its normal speed.
There are actually two different sets of screen options in Dodonpachi Resurrection, with one set of options pertaining to the menus (All Modes), and another set of options for each individual game mode. By default, the game is presented in Yoko mode, but options for Tate left, Tate right, and even upside down Yoko are also available. What is nice about the Xbox 360 port is that the Yoko and Tate modes are displayed in the same resolution (at least in HD) by default, meaning that there is no graphical difference or alteration between the two. Players can also adjust the size of the gameplay screen so that it will fill their display, if they wish to do so. In certain modes, players can enable an additional score display, which breaks down the score for the current stage by its individual sections, and a high score display, which does the same for the player’s highest scoring run. Both of these windows can be moved and adjusted to fit the player’s needs. Players can also trigger an input display, and display one of four extra window presets. The extra windows are nowhere close to as customizable as they were in the Xbox 360 port of Mushihime-sama Futari Ver. 1.5, but they do allow for players to have a larger display of the score, ship or bomb stock for the player one or player two side. Like the score displays, these extra windows can be moved around or disabled entirely, depending on the player’s choice. There are also background wallpapers, 32 in fact, with at least 9 of them being designed for use in Tate mode.
If players have the Black Label DLC installed, they gain access to a really cool hidden feature in Resurrection. By going to the sound option via the main menu’s options, players can customize what music is played in each mode. Not only that, but each mode has two options: “Area Music” and “Other Music”. The Area Music option gives players the ability to have either the original Ver 1.5 music, or the Black Label version of that stage’s music during gameplay. Players are free to intermix Ver 1.5 and Black Label versions, but they do something like having the Stage 1 music play on Stage 3. The Other Music option covers things like the select screen, boss music, etc. It’s a really cool feature, though it would have been really nice to allow for additional options, like the arranged music CD that came with the Dodonpachi Resurrection: Deluxe Edition release (the only edition released in PAL territories).
Each gameplay mode in the Xbox 360 port, with the exception of Arrange Mode B, features its own specific customizable training mode. Overall, the training mode is really in-depth, and while not the best training modes out there, it is pretty great. Players have an impressive amount of customization in Resurrection‘s training mode. Players can choose what Ship Type, Style, and stage to play, but they can also select if they want to play the Normal, Omote, or Ura version of a stage, as well as the hidden boss route or not. Players can even start from the beginning of a stage, before the midboss (or second midboss in Stage 5), or at the boss. The training mode also features some advanced options, such as the ability to not only set things like the MAXIMUM Bonus, or the Hyper Gauge, but specifically set how much of Hyper Gauge is filled, start with an active Hyper Counter, how much time is left if the Hyper Counter is active, and current Hyper Rank. Players can even set the combo gauge, how full it is, how many HITs are in the current combo, and even their score! It’s a very nice training mode that really helps in not only learning the game, but testing out certain routes or strategies. It was an invaluable tool for this article, allowing things to be cross-checked and confirmed very easily.
Arrange A (ver L) Gameplay
The controls for Arrange A are the same as Daifukkatsu. Players cannot select their ship or Style in this mode, instead, they will pilot a ship similar to the Type-A Power Style ship from Daifukkatsu, but with a few twists. For starters, the ship’s Hyper Counter System has been altered to use the Hyper Medal system from Daioujou. Collecting a Hyper Medal will now produce a numbered ring around the player’s ship, providing another way for players to check how many Hypers they currently have. Additionally the ship’s Hyper Counter weaponry has been significantly beefed up, especially in Boost Mode, sporting a wider Shot and Laser. Visually, Daifukkatsu‘s Power Style used one set of options in Normal Mode, and two sets in Boost Mode; Arrange A uses three sets of options in Normal Mode and four options in Boost Mode. This makes the ship’s Normal Mode take on Daifukkatsu‘s Boost Mode aesthetics, though the ship retrains Normal Mode’s mobility. Because of this change, the Boost Mode weapons are even more powerful than before, with the Shot and Laser possessing a wider range. Boost Mode also generates more Hyper Gauge than Normal Mode while using a Hyper Counter. When not using the Hyper Counter, Normal Mode generates more Hyper Gauge than Boost Mode does. Overall, the bullets have been changed to have a grittier look to them reminiscent of Daioujou, as is the visual design. There are now tiny targeting information boxes around each bullet, enemy, and even bee icon location. These boxes are just a new visual element, and don’t do anything gameplay wise. In terms of scoring, gameplay has reverted back to focusing on the hidden bee icons, while taking advantage of the more fleshed-out Hyper Counter system. The stage complete pictures are taken straight from Daioujou, basically telling the player that this mode is Daioujou in Resurrection. Actually, Arrange A Mode is a direct sequel to Dodonpachi Daioujou Death Label. While there is not much in the way of an introduction, this mode does feature its own unique loop entry conversations as well as an ending that ties the two modes together. Arrange A features an Omote and an Ura loop, with the conditions to access them being the same as they were in Daifukkatsu. Additionally, Hibachi has new attack patterns that manage to have even more bullets onscreen than Black Label‘s Zatsuza does, though not by much.
The Hyper Counter system has been changed in Arrange A, with each mode serving a different purpose. When the Hyper Gauge is full, all onscreen bullets are canceled and a Hyper Metal slowly descends from the top of the screen, just like in Daioujou. Players can hold up to five Hyper Metals at once, with each Hyper Metal strengthening the power of Boost Mode, and the combo bonus of the Normal Mode. The duration of the Hyper Counter will always be the same, regardless of the Hyper Rank, or the number of Hyper Metals used when activating. In Arrange A, the Hyper Counter acts differently depending on what Mode is currently being used. The Normal Mode Hyper has been changed to resemble the plain yellow Hyper from Daioujou, while the Boost Mode Hyper features a pink and purple glow. In Normal Mode, it becomes very difficult to cancel incoming bullets, but each of the player’s Shot that comes into contact with an enemy bullet will slow it down, and add +1 to the HIT counter. This makes the Normal Hyper Counter Shot great at quickly jacking up the current combo counter for scoring. Normal Mode also causes the Hyper Counter’s timer to decrease at a much slower rate, at the cost of slower Hyper Gauge gain. In Boost Mode, the Shot cuts through enemy bullets, canceling them into star chips. Players can only cancel bullets that match their Hyper Rank or lower. This is only an issue on the bosses and midbosses though. The Boost Mode Laser is incredibly powerful, and provides the most Hyper Gauge (via the Laser Aura) of the four Modes. However, this power comes at a price, in addition to the Hyper Gauge being drained at a much faster rate than in Normal Mode; Boost Mode causes enemies to fire even more aggressively than usual. If things get too dicey, players can manually exit Hyper Mode by pressing the Hyper button. Doing so will instantly cancel all bullets onscreen. Ultimately, it’s best to use the Normal Hyper Counter whenever possible, only switching into Boost Mode to clear the screen when getting overwhelmed.
The only items found in Arrange A are the “B” items and the hidden bee icons. The “B” items act just as they do when using Power Style in Daifukkatsu, though the MAXIMUM bonus now has a maximum of x 21 (it was x 11 in Ver 1.5). The bee icons have also been changed, and now behave more like they did in Daioujou. There are no more green bee icons, only the gold and flashing icons. Collecting a gold bee icon fills the Hyper Gauge by 25%, while collecting a flashing icon gives 50%. The bee icons are outlined in Arrange A, making it a great place to learn the locations for the other modes. Dying does not break the current chain, but it does award 33% Hyper Gauge.
Arrange A (ver L) Scoring
The real key to scoring lies with the hidden bee icons, much like Daioujou. There are no green bee icons in Arrange A, just the gold ones. Collecting a golden bee icon will award the current combo counter multiplied by X00 points, but; collecting an icon while its flashing will instead award X0,000 points, with the X representing the value of 6 minus the current stage number. Collecting at least one flashing bee icon adds a x2 multiplier as well, with each subsequent flashing bee collected on the same life adding one to that multiplier. Additionally, collecting every bee icon in a stage will award an additional multiplier upon collecting the last bee. For example, if the player collected every flashing bee icon on Stage 1 (normal route), and collected the last flashing bee icon with 10,000 HITs, they would receive 10,000 HITs x 50,000 points x 8 x 2, for a whopping 8 billion points! Collecting the last bee icon in the same conditions except it was not flashing will instead award 10,000 x 500 x1 x 2 points, or 10 million points.
However, the bee icons are worth diddly squat unless the player has a high combo counter when they are collected. The easiest way to increase the combo counter is by using the Normal Hyper Counter Shot on incoming bullets. Remember that the more Hyper Metals used in a Hyper, the larger the combo bonus will be. So, the goal is to continuously build up the combo chain throughout a stage, using high level Hyper Counters as much as possible, while collecting all the flashing bee icons…without dying. It may sound tough, but it’s not that bad thanks to the generous amount of Hyper Counters Arrange A generates.
Arrange B Gameplay
Daifukkatsu‘s Arrange B Mode is radically different from every other mode on this disc, in fact, Arrange B is almost like an entirely new game. Most shmups will always play the same every single time, even after thousands of playthroughs. Power-ups will always be in the same spot, enemies will always appear in a certain order, fire a specific pattern, and will always take a certain amount of shots to destroy. Arrange B changes that formula up completely by making the game harder (or easier) with each subsequent play through. Essentially, the more the mode is played, the more difficult it becomes. Enemies will adapt, getting stronger or weaker according to how the game is played. It forces players to push forward and exceed their own limitations with each run. Arrange B forgoes any sort of standard “Arcade Mode”, instead opting for a more “score attack” feel. Each run consists of only a single stage, with each one having its own score table. There is a total score made up the best score from each individual stage, but there are no leaderboards for that specific number. Because Arrange B is a stage-based mode, it does not have its own separate training mode.
Arrange B uses a simplified two button control scheme. Pressing the A button will fire the Laser, with the Shot automatically firing when the button is not pressed. The B button pulls double duty, controlling both the Bomb and Hyper Counter commands. Tapping the B button will launch a Bomb, and holding the button will activate the Hyper Counter. The Hyper Counter is quite different, as it can now only cancel red bullets and only with the Shot. The activation invincibility has also been removed in this mode by default. The player’s ship has the strength of Bomb Style, but with two additional options to the left and right in front of them. When the A button is not held down, these options fire a very short Laser in front of them. While using the Laser, the options will increase to their full length, which is about 50% of total screen height. The player does have unlimited lives in this mode, with each death reducing a percentage of the player’s current score. Luckily, the penalty suffers from diminishing returns, meaning that the penalty is lowered with each death. The penalty is reset after every stage. A big change in Arrange B is that the Hyper Counter can only cancel red bullets, and the cancelled bullets turn into masses of expert items worth 10 points. These items are sucked in automatically while in hyper mode. Launching a bomb cancels all bullets onscreen and causes heavy damage to enemies. The player is also invincible during the explosion, and all expert items and star items are sucked into the ship. A ring of “DANGER” indicators will spring up around the ship when the enemy bullets approach it, this is known as “Bullet Support”. The Bullet Support options will slow down any bullets they touch, in an effort to make dodging easier, but this also can cause the bullets to create an inescapable cluster, so be careful. Bullet Support becomes even more effective during a Hyper Counter.
After selecting their Ship Type, players can choose to enable three different customization options for their ship: Bomb, Laser, and Hyper Customization. Each customization option boosts some form of the ship, at the cost of something else. The Bomb Customization, for example, boosts the regular bomb’s power (not the Auto or Free Bombs’ power), but causes the Hyper Bomb Gauge to take longer to refill. The Laser Customization will lengthen the range of the ship’s side lasers to about 95% of the total height of the screen (usually only 50%) at the cost of slower movement speed overall. The Hyper Customization adds the brief period of invincibility upon Hyper Counter activation back in, but causes the Hyper Counter to last for a much shorter period of time. Once the player has decided on what customizations they want to use (if any), selecting the “Init” option under Hyper will start the game.
Ok, now that game has started and… wow, the interface for Arrange B is a jumbled mess. There is very little resemblance to Daifukkatsu‘s UI, with no explanation as to what everything means or represents. There’s so much information that it’s hard to keep track of everything while playing. Actually, it might be best for players to just focus on the action, with quick glances to specific areas to get updated information.
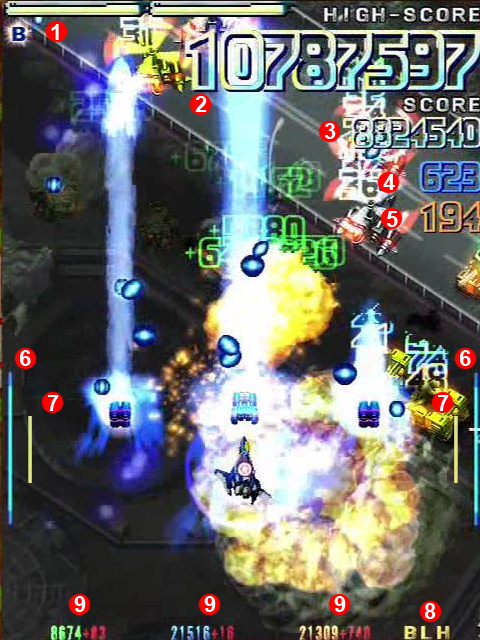
What a mess! The numbers are described below
The best way to explain this UI is to systematically break it apart and explain each component individually. To accomplish this, each UI component is going to be explained starting from the top left corner, and going clockwise to the bottom left corner. Each explanation will also begin with the corresponding number for easier navigation. (1) In the top left top two gauges in the top left corner represent the Hyper Bomb Gauge. In Arrange B, the Hyper Counter and Bomb weapons cost one of these meters to activate. When one of the gauges is full, a “B” bomb icon will appear in the top left corner. If players have both gauges full at once, they gain access to the Auto-Bomb ability, which is activated automatically if hit, at the cost of one Hyper Bomb Gauge. These gauges cannot be increased at the same time. When the Hyper Counter is activated with two full gauges, the player’s ship will gain a noticeable blue aura. While this aura is active, the player can use a “Free Bomb”. The Free Bomb is just as it sounds, it is a bomb that the player can use without the cost of a Hyper Bomb Gauge. The Free Bomb becomes the key to scoring later on. (2) Is the player’s highest score on this stage, and (3) displays the player’s current score. Below the score lies the Global Rank values. These values represent how strong the enemies are in all stages of Arrange B. The blue number (4) represents the High-speed Bullet Rank. The orange number beneath the High-speed Bullet Rank represents the Bullet Swarm Rank (5). These two stats affect the strength of all enemies in all stages in Arrange B, and will increase the more the mode is played. However, getting hit will cause the values to decrease. On the left and right side of the screen are two colored gauges: the blue Expert Gauge (6) and the yellow Destruction Gauge (7). The Expert Gauge increases whenever Expert Items are collected. Having a high Expert Gauge causes the Global and Enemy Ranks to grow much quicker than normal. The Destruction Gauge increases whenever an enemy is destroyed, or hit by the Laser. When the gauge is in the red, enemies will drop Expert items when destroyed. Both of these gauges rapidly decrease as time passes. (8) Displays the active customizations. (9) Represents the Area Ranks, which only affect that stage’s enemies. These stats rise whenever enemies are destroyed, hit by the laser, and even time played. The green number represents the enemy’s defense rank, the blue value is High-speed Bullet Rank, and the orange number is the Bullet Swarm Rank. To the right of each Rank is a red +number, this value represents how much each individual value will increase upon completing the stage. Unfortunately it is not possible to decrease any of the Area Rank values, but getting hit will lower how much they will increase after completing the stage.
In Arrange B, each enemy and boss has a series of numbers displayed on top of them. These values represent the Enemy Rank and Boss Rank, respectively. The Enemy Rank displays the current defense, High-speed bullet, and Bullet Swarm Rank, the colors of which match the Area Rank. These stats are unique to each enemy, and are added on top of the Area and Global Ranks. Destroying enemies before they get the chance to fire will raise their Defense Rank. Destroying enemies with the Shot (or in Blue Grid) will increase the High-speed Bullet Rank, and enemies destroyed via the Laser (or in the Red Grid) will cause the Bullet Swarm Rank to increase. Getting hit will cause the Rank of all enemies onscreen to drop, as well as the mode Rank. Any enemies that hit the player have an addition decrease to their Rank. Bosses have the High-speed Bullet and Bullet Swarm ranks, but they increase in a different manner than the Enemy Rank. For the Boss Rank, their values increase whenever the boss changes form and when they’re defeated, but only when they are in a Blue or Red Grid, unless a Bomb caused the change or defeat, then the rank is not increased. If the player gets hit, only the Rank for the grid they were in will decrease.
Most of the items found in Daifukkatsu still exist in the Arrange Mode B. Only the “B” item has been outright removed. Arrange B replaces the aerial star items with a new “Expert Items” worth 10 points each. These Expert Items are actually the grey hexagons that make up the WARNING background before every boss. Destroying an aerial enemy will create six of these items. Destroying a ground enemy will create a ground star item. The ground star items no longer award points in Arrange B, instead filling the Hyper Bomb meter. Large stars fill the meter more than the small stars do. Lastly, there are the bee items, which are already exposed in this mode. Their purpose will be explained in the next paragraph.
A unique feature to Arrange B is the Grid system. Grids alter the game stage and cause enemies to use different attacks depending on the active grid. There are in total four different types of grids: Blank, Blue, Red, and Green Grids. For the most part, the different grids can only be triggered by the color of the bee icon when it’s collected. Thankfully, the bee icons are already uncovered by default in Arrange B. Collecting a green bee icon will trigger the Blue Grid, which causes enemies to fire high-speed aimed patterns at the player, as well as cause the blue stat value (High-speed Bullet Rank) to rise. The gold bees trigger the Red Grid, causing the enemies to fire slow, dense patterns at the player. While the Red Grid is active, the Bullet Swarm Rank (the orange number) will increase. Collecting a flashing bee icon while the Hyper Counter is not active will trigger the Blank Grid. The Blank Grid is also active at the start of each stage. The Blank Grid causes enemies to fire their Normal patterns, and allows both ranks to be manipulated. Using the Shot will raise the High-speed Bullet Rank, and the Laser will cause the Bullet Swarm Rank to rise while the Blank Grid is active. The fourth and final grid type is the Green Grid. This grid can be triggered one of two ways. The Green Grid is triggered when the player gets a high score, or collects a flashing bee icon while the Hyper Counter is active. The Green Grid is a combination of the Red and Blue Grids, causing both Rank values to rise, while the enemies also fire fast, dense patterns at the player. Note that the bee items themselves are not worth any points in Arrange B.
Arrange B Scoring
Arrange Mode B’s gimmick is that it gets harder the more it’s played. As the game become more difficult to clear, the amount of points enemies are worth will increase. This means that, theoretically, an enemy destroyed in one run should be worth even more during the next. As such, players should theoretically achieve a new high score on almost every run. Because of this unique scoring system, players must replay the same stage multiple times to drive up the Area, Enemy, Boss, and Global Ranks, and repeat this process until even the popcorn enemies are worth big points. The problem with this is that eventually even the popcorn enemies will have so much health that the player’s Shot or Laser won’t be able to defeat them before they leave the screen! Not to mention the swarm of enemy bullets they will have to dodge. Luckily, Bombs in this mode do crazy damage, and become the key to scoring. Once the rank is high enough, the general scoring strategy is to into the game with the Hyper Customization, and wait until the screen is filled with bullets. Then, when the player has two full Hyper Bomb Gauges, use the Hyper Counter’s brief invincibility to get right on top of an enemy, and trigger a Free Bomb, using its invincibility to do a point-blank refill for the Hyper Bomb Gauge. Then, repeat this process for the entire stage. The method may sound simple, but it requires precise timing to execute effectively.
Ver 1.51 Gameplay
Dodonpachi Daifukkatsu Ver 1.51 was initially only available for play at the 2010 Cave Matsuri festival. It is a very high score-based mode, featuring simplified controls, one loop, and always has the player fight the hidden Dodonpachimidbosses, as well as Taisabachi and Hibachi after Stage 5. It was not uncommon for the Cave Matsuri festivals to have tweaked and altered versions of other Cave shmups, not unlike the Arrange Modes found in their console ports. These versions were usually incredibly limited, with maybe one or two versions of the game ever put on a PCB. Sometimes Cave would give the boards away to whomever got the high score in that version, sometimes they would not. That was just how it went. But, thanks to the Xbox 360 and the rise of DLC, Cave now had a way to widely distribute these specialized versions to interested fans. To purchase the Ver 1.51 DLC, players with the Japanese Daifukkatsu Ver 1.5 will need a Japanese Xbox Live account, and Resurrection owners will need an EU Xbox Live account to access the Xbox Live Marketplace and be able to purchase the Ver 1.51 (and/or the Black Label) DLC. Once the DLC has been downloaded and installed to the console it can be played on any account without any restrictions. The DLC is about $1 US, and well worth it.
The controls for Ver 1.51 have been simplified from Daifukkatsu, but not as much as Arrange B. Rather than have dedicated Hyper and Bomb (or Power) buttons, this mode crams them all into a single button, making Ver 1.51 a three button game. The A and C buttons remain unchanged from the standard version of the game. Players can select from all three Ship Types, as well as all three Styles, but, if playing for score, there is really only one option: Type-B Strong Style. No other combination comes even close to the scores this combination can pump out. Ver 1.51 has a forced Auto-Bomb system, which is triggered whenever the player gets hit (so long as they have a bomb). Normally Auto-Bombing takes away two bombs, but if the player is on their last bomb, then it will only take the one. The Hyper Counter has been altered, now serving as a user-controlled Rank system. The max hyper Rank has been increased from 5 to 9 to reflect this change. Ver 1.51 also features its own unique scoring system, which will be detailed later on.
Functionally, Hyper Counters remain largely unchanged inVer 1.51, but due to the simplified controls, players have lost the ability to cancel an active Hyper Counter. Well technically, they still can by pressing the button again, but that will launch a bomb, and that will cancel the Hyper Counter. Attacking or destroying enemies with the Shot does not award any Hyper Gauge in Ver 1.51, but doing so with the Laser, will. The amount gained can be increased further by attacking enemies with the Laser up close. This is because Ver 1.51 surrounds the player’s ship with a green aura, (similar to what the Power Style had in Daifukkatsu) regardless of Style. Simply attacking enemies with the Laser while they are in this aura will cause a notable increase to the player’s Hyper Gauge.
The Hyper Counter retains the Rank system from Daifukkatsu for the most part. Each stage resets the Rank back down to Hyper Rank 0, with this being the only way to reduce the Hyper Rank in the game. The Hyper Rank will still increase one level with activation, but outside of the Hyper Counter’s ability to cancel bullets, it’s nothing significant. Until players reach Hyper Rank 6, at which time they must be very careful. In and of itself, Hyper Rank 6 is no big deal, but it’s what comes after that is the threat. If a player reaches Hyper Rank 7, all enemies instantly switch to their Ura patterns (complete with suicide bullets) for the remainder of the stage. The bosses, on the other hand, still retain their Normal patterns, but, will use their Ura patterns if the player is at Hyper Rank 9.
Items present in Daifukkatsu return again in Ver 1.51, though what each item does has been modified in some form or another. The “B” Item now completely restocks the player’s bombs and puts them in MAXIMUM Mode, which now caps out at an x52 multiplier, though reaching that point is unrealistic. The green bee icons are still worth 100 points, but act like the old “B” item did, as collecting one awards the player a bomb or furthers their MAXIMUM Bonus. The gold bee icons no longer award points, but instead hyper meter. Flashing bee icons still let the player claim both icons at once. The star icons have been modified as well. The ground star icons now only award Hyper Gauge, with the small stars awarding 1% and the large stars 5%. The aerial stars only appear as a result of the Hyper Counter, with small stars appearing by destroying bullets and enemies, and the large stars created from any onscreen lasers upon exiting the Hyper Counter. The point value of the star items are multiplied by the player’s current HIT count in this mode. The 1-Up item is still in the big eye thing near the end of the third stage, and will still appear so long as the player does not bomb that enemy.
Ver 1.51 Scoring
Although there are several factors that make up Ver 1.51‘s scoring, it can be reduced down to simply: “continuously point-blank Bomb the boss’s Laser attacks”. The combo chaining system is still present in Ver 1.51, with some alterations. The first change is that there are only two ways to break a chain in this mode: dying, and having an empty chain gauge as well as an empty Hyper Gauge. In this mode, the player’s Hyper Gauge acts as a secondary chain gauge; if the current combo chain gauge is empty, then the Hyper Gauge will start to deplete, and if it eventually becomes empty, then the combo chain will break. The +MAX HIT count persists from stage to stage, and becomes an integral part of the scoring. Ver 1.51 removes the invisible score multiplier, from Daifukkatsu Ver 1.5, which is actually a good thing, or else score would become even crazier than they already are. Instead, the focus of Ver 1.51 is in the +MAX HIT counter.
The easiest way to explain the point system is with an example. Let’s say that a player has a current HIT count of 9,999 (Also their MAX HIT value), a cumulative combo value of 0, and they just destroyed an enemy worth 130 points in a single hit. Those 130 points are to be added to the cumulative combo value, in addition to the current MAX HIT value (which is now at 10,000), making the cumulative combo value now worth 10,130 points. The new cumulative combo value is then added to the old value (0, in this case), and the resulting value is what is added to the player’s score. If the player destroys another 130 point enemy in a single shot, 10,131 points are added to the cumulative combo value, which after combining with the previous value, with the new result (20,261 points) being added to the player’s score. Now, in Ver 1.51 the cumulative counter will increase as such every time an enemy is attacked or destroyed. This also occurs when using the Counter-Laser for some reason, which ends up becoming the key when it comes to scoring. At the start of each stage, most of the player’s combo the player’s Hyper Counter Rank, cumulative combo value, combo gauge and current HIT value are reset. Notice that the +MAX HIT Counter does not reset However, what makes the +MAX HIT value so important is that its value persists throughout the game (although the current HIT value is reset) unlike the Hyper Counter Rank, it is not reset at the beginning of every stage.
Ver 1.51 is all about positioning. Players need to learn where the best Counter-Laser spots are, and how to get the maximum amount of points they can get from them. The “goal” of sorts, is to max out the cumulative counter value as fast as possible. Having a high MAX HIT value can speed this process up, but ultimately, it’s the Counter-Laser that cause the counter to skyrocket. In Ver 1.5 destroying a certain number of bullets during a Hyper Counter would cause a yellow “DANGER” hexagon to spawn and shoot an aimed small laser at the player. The number of bullets required for this was pretty high, so they didn’t show up too much. In Ver 1.51 that number has been lowered to have one spawn for every 500 bullets destroyed. Plus, destroying a DANGER Laser causes it to spawn bullets for the total length of its laser, meaning the longer the laser was, the more bullets it generates. It’s not uncommon to destroy one and spawn two more after canceling the resulting bullet barrage. This is the quickest way to jack up the all-important HIT counter, eventually having it become the MAX HIT value as well. Speaking of, both the HIT and MAX HIT counters max out at 99,999. The cumulative combo counter “maxes out” at +99,999,999; and while each enemy destroyed after this point will raise it past 100,000,000; it will instantly revert back to 99,999,999 afterwards.
In Ver 1.51, players no longer lose their MAXIMUM Bonus multiplier when exiting that mode. Instead, the multiplier is reduced by two upon exit, and re-entering that mode adds plus one to the multiplier, resulting in a net loss of only one multiplier point. However, the MAXIMUM Bonus is reset upon dying, and seeing as how most scoring strategies have the player suicide during boss fights, it never becomes as big of an impact as it could be. The aerial star items are worth a set amount multiplied by the current HIT counter, and while they are nothing special on their own, having twenty to fifty max range DANGER Lasers cancel into large star items at the end of a Hyper Counter can add up, especially with a large HIT counter.
Now, for some general tips and strategies for scoring in Ver 1.51. First, avoid using the Auto-Bomb, as it not only launches a bomb with a much shorter duration, but it costs two bombs to use! It is very important to go into each boss fight with a full bomb stock. Though not ideal, it is always better to use a single manual bomb, when a player thinks they are in trouble, than to guess wrong and wind up losing two. During the first half of the stage (before the midboss), focus on canceling bullets, giving the HIT counter a nice initial boost. Then, after the midboss, focus on generating lots of DANGER Laser enemies and Counter-Laser their attacks, causing the cumulative counter to skyrocket. Be careful when using the Hyper Counter, remember that enemies will switch to their Ura loop patterns at Hyper Rank 7, with the boss’s using their Ura patterns at Hyper Rank 9. Players will want to hang at the bottom of the screen, staying in a corner and canceling bullets to spawn more lasers. Don’t get anxious and start destroying the DANGER Lasers as soon as they appear, let them reach at least half of their max length to get a decent number of bullets from them.
Players will want to suicide on the first three boss battles (to increase their max bomb stock), but try to conserve their lives from that point on. Always go into boss battles with a full stock of bombs for maximum points. If there is a bomb carrier right before a boss battle, destroying it late can allow them use burn through their initial bomb stock and then refill it before the “B” item disappears. The “B” item will float around in five increasing loops, before disappearing on the left side of the screen. During the item’s final loop, it will pass through the boss’s health meter as it moves left to right at the top of the screen. Look out for this, as that means that it will go off-screen a few moments later. Also, many of the boss’ Ura patterns feature nearly twice the lasers as their Normal version. Rather than having them use their Ura patterns the entire time, smart players can combine the “B” refill technique to be at Hyper Rank 8 and have a full Hyper bar. Since bosses cannot change their current pattern into their Ura patterns, players can trigger the Ura patterns, but not have them activate until the next pattern begins (which was the desired pattern to begin with).
Novice Modes
Dodonpachi Resurrection features a Novice mode for the Xbox 360 Mode as well as the Black Label Mode. These modes are just like their non-Novice mode counterparts, just with less bullets. Even with a Maxed out RED Gauge in Black Label Novice, the enemies will still fire less bullets than they normally would in the standard version of the game. The bee icons are already uncovered in this mode, a great idea for beginning players. The chain gauge is also more forgiving, with more time having been added before it depletes. Also, players can unlock all of the Ver 1.5 achievements while in Novice mode, making certain ones like facing Hibachi actually possible for far more people than what was in the original arcade version (less than 1%). That said, players looking for an easy 2-ALL should take note that eventually their Rank will be high enough so that the game becomes just as difficult as the standard Daifukkatsu, most notably in the later levels.
Daifukkatsu / Resurrection Arrange CD
There are a number of different ways to arrange a piece of music, for example, Black Label took Daifukkatsu‘s music and just turned it up to eleven. But RESONATOR (Kenji Ito and Kohta Takahashi) took a different approach. They decided that each track would take a slow and chill tempo with a midi / retro sound. Taking a piece of music, and thrusting it into a wildly different style than it was intended for usually ends in disaster, but somehow, RESONATOR managed to make it work, and work well. Each track is recognizable, but also feels fresh and new. A great example of this is how RESONATOR somehow managed to take the high intensity Stage 1 track “The Year 2008, Tokyo” and turn it into a slow, melodic piece that works. Of course, Hibachi refuses to be tamed, retaining its blistering pace, it actually causes the track to feel out of place when compared to the rest of the CD.
Final Thoughts on Resurrection
When Dodonpachi Resurrection was released in Japan, it was a good deal. When it was translated and released in Europe, it was a pretty good deal. Now that it’s on the Xbox Marketplace as a digital download, at half its original retail price, it is a great deal. There are just so many different gameplay modes and features packed into this release, and they are all extremely well done and executed. The original Arcade version of the game looks great with its new HD graphics, and is a very playable version of the game. Arrange A is a fun mode that can be easy to 1CC thanks to the large amount of Hypers, but still provide a healthy challenge to those who seek it. Arrange B can be fun in spurts, but it can quickly turn into a grind. While it can be fun and certainly interesting to see just how intense the game can get at high Ranks, it’s not really worth the time required to get to that point. Ver. 1.51 is super fun, and provides a great twist on the game. That said, ver 1.51 may not be for everyone, as the game separates itself from the standard Cave tropes (“Real men don’t bomb.”), instead borrowing from Yagawa / Raizing’s trope of “bombs are meant to be used”. It’s that divergence in philosophy that makes Ver 1.51 so refreshing and fun to some, and broken to others. The Novice modes are a great addition as well, with easier mechanics that allow more people to experience the entire game, not just the first stage.
Players that own have a Japanese Xbox 360, it is well worth the money to get the Dodonpachi Daifukkatsu Ver. 1.5 / Dodonpachi Daifukkatsu Black Label Double Pack. For everyone else, get the European Dodonpachi Resurrectionrelease, physically or digitally, though getting the DLC may be a bit of a hassle, there are plenty of guides online for setting up Xbox Live accounts for different regions, and with the Microsoft Store now using real money-dollars instead of fake Microsoft Points, players no longer have to through the possibly shady route of purchasing Microsoft Points for a different region. This release has something for everyone, and is easily the most approachable entry in the DonPachi series.
Dodonpachi Resurrection / Dodonpachi Resurrection HD – iOS, Android (August 28, 2010)
In 2010, Cave decided to get into the booming smartphone market, and began porting their SH3 games (arcade shmups released after 2004) to iOS and Android devices. Their first release was a port of Espgaluda II, and was successful enough to prompt Cave into porting more of their SH3 games to smartphones. About six months after the release of Espgaluda II, Cave released their next game, Dodonpachi Daifukkatsu under the translated title of Dodonpachi Resurrection for English speaking countries. The game itself features updated HD graphics, translated endings and menus, as well as a new (barely) English-speaking Operator. While the original Japanese operator is available, it requires the user to change their device’s origin to Japan for it to work. This release also contains two different gameplay modes: an Arcade Mode (a port of Dodonpachi Daifukkatsu Version 1.5) and a newly optimized “Smartphone Mode”, which features a new gameplay system, and, for the first time ever, the ability to play as the “Supreme Killing Weapon” itself: Hibachi. Also included are training modes for each gameplay mode, with the ability to select from the Normal, Omote, and Ura loops (though the loops and stages must first be reached in the game before selectable). The game also includes a decent tutorial explaining how to properly play each mode, providing a basic explanation of the different gameplay systems.
Gameplay
The controls have been modified to use Cave’s wonderful touch controls. As in all of Cave’s mobile releases, the player is always shooting by default. Players manipulate their ship by simply sliding their finger across the screen. Doing so will cause the player’s ship to mirror the movement relative to its current position with a stunning 1:1 accuracy. This movement system removed the various movement speed limitations found in the arcade game, but it feels great and ultimately gives the player an unprecedented level of control. Players control the Shot, Hyper, Bomb, and Laser commands via on screen soft buttons, but they are spaced too far apart on tablets, making it very difficult to operate effectively without setting it on a table. Players can also adjust the size of the screen, or have it flipped (for better headphone jack placement) though the controls remain the same regardless of screen size or view mode (but they are flipped accordingly).
The new Smartphone Mode centers around a new system dubbed the SM Mode, where the S stands for Slaughter, and the M, Menace. Overall, the Slaughter and Menace Modes act like the Power Style’s Boost and Normal Modes, respectively. Players will have a boosted Shot and Laser while the Slaughter Gauge is completely filled, otherwise they are forced to use a much weaker versions of their weapons. When in Slaughter Mode, the score multiplier will rapidly decrease, but players can gain more score items by destroying enemies up close. Menace Mode acts like the bullet scraping systems found in most doujin games (most notably the Touhou series). Menace Mode causes a red circle called the “Scrape Field” to appear around the player’s ship. Players will want to maneuver the ship in such a way that enemy bullets will pass through the red circle, but not hit the player. This is called “scraping”. In the Smartphone Mode, scraping against enemy bullets will shift the SM Gauge towards Menace Mode. When the Menace Mode bar is maxed out, the player’s Hyper Gauge will increase at a much faster rate than normal. Regardless if the player is in full or only partial Menace Mode, so long as they are in Menace Mode, the score multiplier on the left side of the screen will increase up to x 1,000.
The Hyper Counter system has also undergone some changes in the Smartphone Mode. For starters, while it is possible to gain meter in Slaughter Mode, the only feasible way to fill the Hyper Gauge by being in full Menace Mode. When the Hyper Counter is activated, the player’s ship will now be fixed to its current location, and the player can now have their ship attack in a particular direction by rotating their fingers around the ship. As the ship rotates, the player will start to gain “Hyper Charges”, which power-up the strength of the Hyper Cannon, a separate attack activated by pulling the handles apart during a Hyper Counter. There are a total of three levels of Hyper Charge, with the highest level taking up the entire screen! However, using the Hyper Cannon will move the player’s ship to the bottom middle of the screen, which can put the player in a very bad spot. See, after the Hyper Cannon finishes, the player is unable to move their ship for a few seconds after the fact. Normally that wouldn’t be an issue, except in this case the invulnerability upon exiting the Hyper Counter expires before the player can regain control of their ship, which can easily lead to death if used in the wrong spots (such as the Laser turrets in Stage 5). Lastly, canceling bullets via the Hyper Counter will cause the gauge to shift towards Slaughter Mode, and using the Hyper Cannon will cause it to shift even faster; but, the score multiplier does not decrease while using the Hyper Counter, making it very useful for big score boosts. It is possible to stock up another Hyper Counter while in Hyper Mode, and before the shift to Slaughter Mode, however, as the shift usually occurs when using the Hyper Cannon.
Resurrection HD features an Auto Bomb ability that cannot be turned off. The Auto Bomb feature is present in both the Smartphone and Arcade Modes. In this version of the game, the Auto Bomb works much like it did with Bomb Style, only using one bomb if triggered, though it will reset any currently active chains or score multipliers if used. The bee items are still present in the Smartphone Mode, and have been modified for use with the new system. In the Smartphone Mode, collecting a green bee item moves the SM Gauge towards M; likewise, collecting a gold bee shifts the SM Gauge towards S. Collecting a flashing bee icon does not affect the SM Gauge, instead increasing the score multiplier by 150 points, even if the player is in Slaughter Mode.
Smartphone Scoring
Scoring in Resurrection HD is a constant push and pull between the Slaughter and Menace Modes. Players will want to raise their score multiplier to its maximum value of 1,000 as fast as possible by scraping bullets in maximum Menace Mode. Then, once the multiplier is maxed, they will want to shift into maximum Slaughter Mode as fast as possible and destroy enemies at point-blank range to generate the large point items. Players should try not to let the multiplier drop below 500. In practice players should only stay in Slaughter Mode for a short time before dashing back over to Menace Mode to the multiplier back up to 1,000. Players will also want to gain a full Hyper Gauge as fast as possible, and then trigger it when surrounded by bullets, causing numerous bullet scrapes and thereby giving a decent Hyper Gauge refill without decreasing the multiplier before the Hyper Counter ends, leaving the player in Slaughter Mode with a x1000 multiplier. At which point the process will just start all over again. Be mindful of the Hyper Cannon though, as improperly timed uses can lead to a cheap death.
Smartphone Mode Music
Resurrection HD features an exclusive soundtrack composed by Kenichi Maeyamada. Resurrection HD‘s soundtrack isn’t bad, it’s just very underwhelming. Kenichi Maeyamada really went for a completely different feel than the original music, causing it to fall short more often than not. The new track against Golden Disaster, “Where’s the Happy Ending?” actually fits quite decently, even if it just a remix of Black Label’s “Desperado”. But then other songs like Hibachi’s theme, “Battle for the Last” just don’t match up with the action onscreen. The original composition, “]-[|/34<#!” captured the fight perfectly. It was blisteringly fast, and overwhelmingly chaotic. “Battle for the Last” has none of these elements, instead opting for a brisk upbeat electronica tune that just doesn’t belong.
Final Thoughts On Resurrection HD
The Arcade Mode of the game suffers from some extensive slowdown in the later stages (especially on the higher difficulties), but other than that it’s a good representation of the original game. The slowdown is a real shame, because the specs for the iPad are much higher than the original Arcade version, which means that this is the result of a poorly optimized port. There are also some odd glitches that can occur if the player is fooling around during gameplay. Rapidly tapping the screen multiple times in different places can cause the ship to jump around the screen, or even offset the input detection, making it harder to control. The only way to fix it is to exit the current run.
Scoring in the Smartphone Mode is not fun. Actually, the Smartphone Mode itself isn’t fun. The enemy locations and bullet patterns remain unaltered from the Arcade Mode, which makes it very difficult to maintain Menace Mode unless playing on the Hard difficulty. Regardless, the mode has some serious problems with the core system itself. As it stands, not having a maxed out Slaughter or Menace Mode is a serious detriment to scoring, and because of high amount of enemies, it can be very hard to maintain Menace Mode for very long. Being able to play as Hibachi is a nice little treat, but Hibachi is nowhere near as powerful as he is in his True Last Boss form, though he would probably cause the game to lag so badly that the game would become unplayable. The Xbox 360 release of Dodonpachi Resurrection may have been one of Cave’s greatest and fullest releases, and puts the iOS version of this game to shame. That said, Resurrection HD isn’t a bad game by any means, it is just that the Xbox 360 port of the game is the vastly superior version of the two ports.
Links:
Daifukkatsu Official Website
Unlocking Strong Style In Arcades Works for Ver 1.0 and 1.5
Hibachi 1.0 Safe Spot An unintentional safe spot against the TLB Hibachi
DFK 1.5 Type A Strong A great run that also shows the Ura loop and TLBs!
DFK Ver. 1.5 Guide An excellent thread detailing Ver. 1.5.
DFK quick 1-ALL + Omote Loop A thread detailing a good start to 1-ALL’ing DFK
DFK Mechanics FAQ A nicely layed-out FAQ by PoochyEXE
DFK In-Depth PDF A nice pdf by Resume detailing DFK Ver. 1.5.
DFK OST Playlist on YouTube
Resurrection Bee Location Guide by Poochy.EXE
Dodonpachi Resurrection Official Site
Accessing the Hidden Route Official video demonstrating how to access the Hidden Route
How to Unlock Hibachi Official video from Cave that details how to unlock Hibachi
Resurrection HD Arrange Mode OST YouTube Playlist
Links:
Daifukkatsu Xbox 360 Official Site
Arrange A Tip Thread A forum post with scoring tips for Arrange A
Arrange A Survivalist A run focusing on survival, with Ura loop
Arrange A TLB Showcase A huge scoring run showcasing the TLBs
Arrange B Breakdown A forum post detailing Arrange B’s systems
Arrange B High Ranking A video that shows how crazy this mode can become
Type-B Strong Ver 1.51 Superplay A superplay of the current 1.51 World Record score
EU Xbox Marketplace Resurrection and its DLC on the EU Marketplace
Arrange Album YouTube Playlist